How To: Use the Best Root-Level Customization Tool for Android
With certain apps and games, it's all about the settings. In order to get your money's worth with one of these, you simply have to take the time to tweak and adjust various options, which is something a lot of users don't necessarily want to do.Take GravityBox for example—the popular all-in-one Xposed module lets you change just about anything in your phone's main interface, but the sheer amount of options it offers can be intimidating.Don't Miss: How to Root Almost Any Android DeviceSo to help you get a better handle on this awesome tool, I'll go over all of the best settings for GravityBox below. And since a guided tour of the entire app would be way too long of a read, I'll just focus on the highlights and the more interesting options, which should get you well on your way.Don't Miss: How to Install Xposed on Android Marshmallow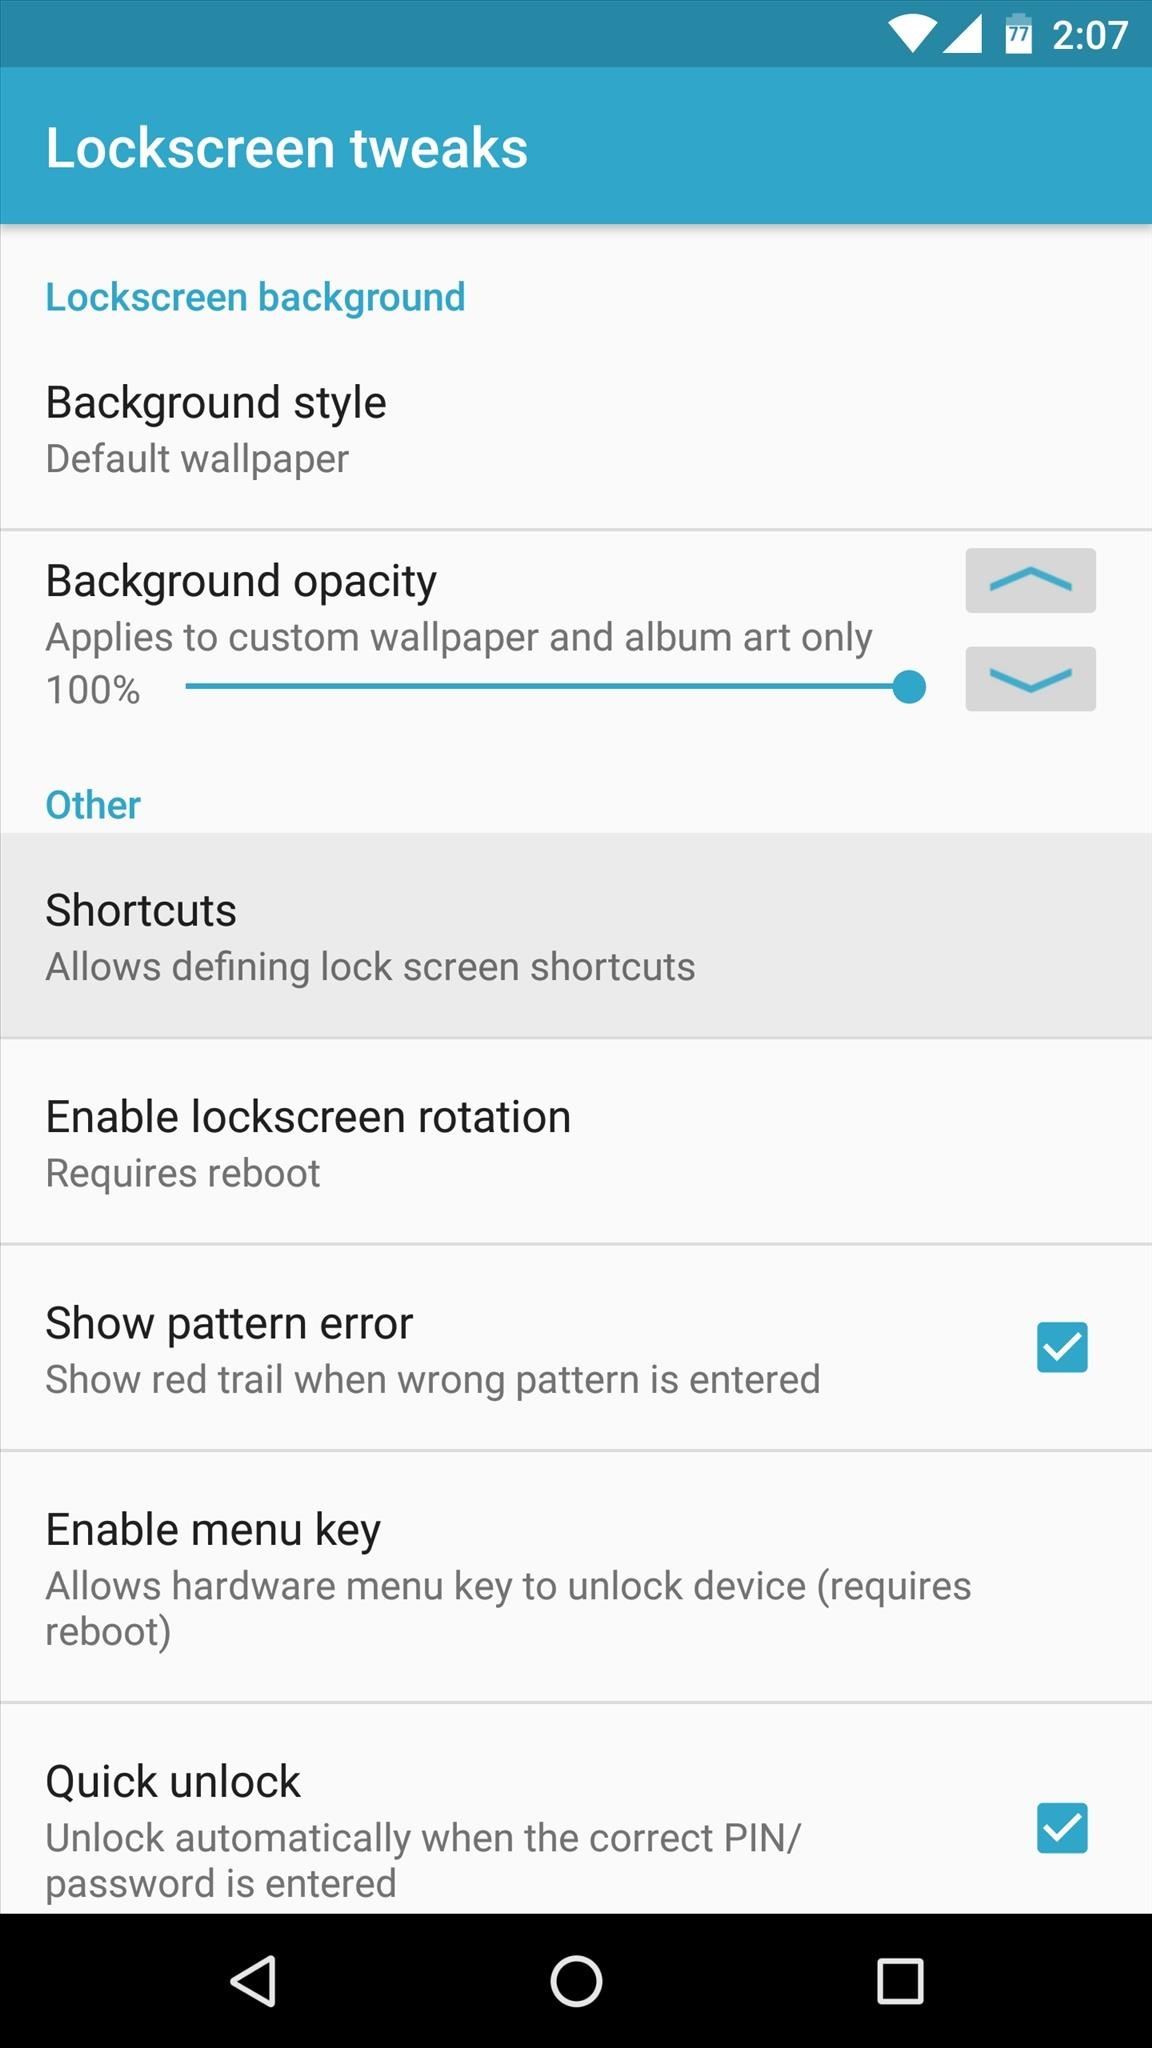
Lock Screen TweaksWorking through the menus in the order they appear, the first category worth delving into is "Lockscreen tweaks."Add Easy-Access ShortcutsPerhaps the biggest difference maker here is the "Shortcuts" option—select this one, then you'll see a menu with six different application slots. You can select as many of these slots as you'd like, then choose either an app or an activity to populate them. They'll appear as small icons beneath your lock screen clock that can be launched in one tap. Unlock Your Device FasterAside from that, the "Quick unlock" option is another good one in Lockscreen tweaks. Enabling this option will remove the need to tap the check icon after entering your PIN, which is one of the things iOS does better than Android.But be careful here, because this option basically just presses enter for you after four digits have been typed in, which means that if your PIN is five or more digits, you could end up locked out of your phone. So after ticking the "Quick unlock" box, make sure to use the "PIN length" slider to let GravityBox know exactly how many digits are in your PIN.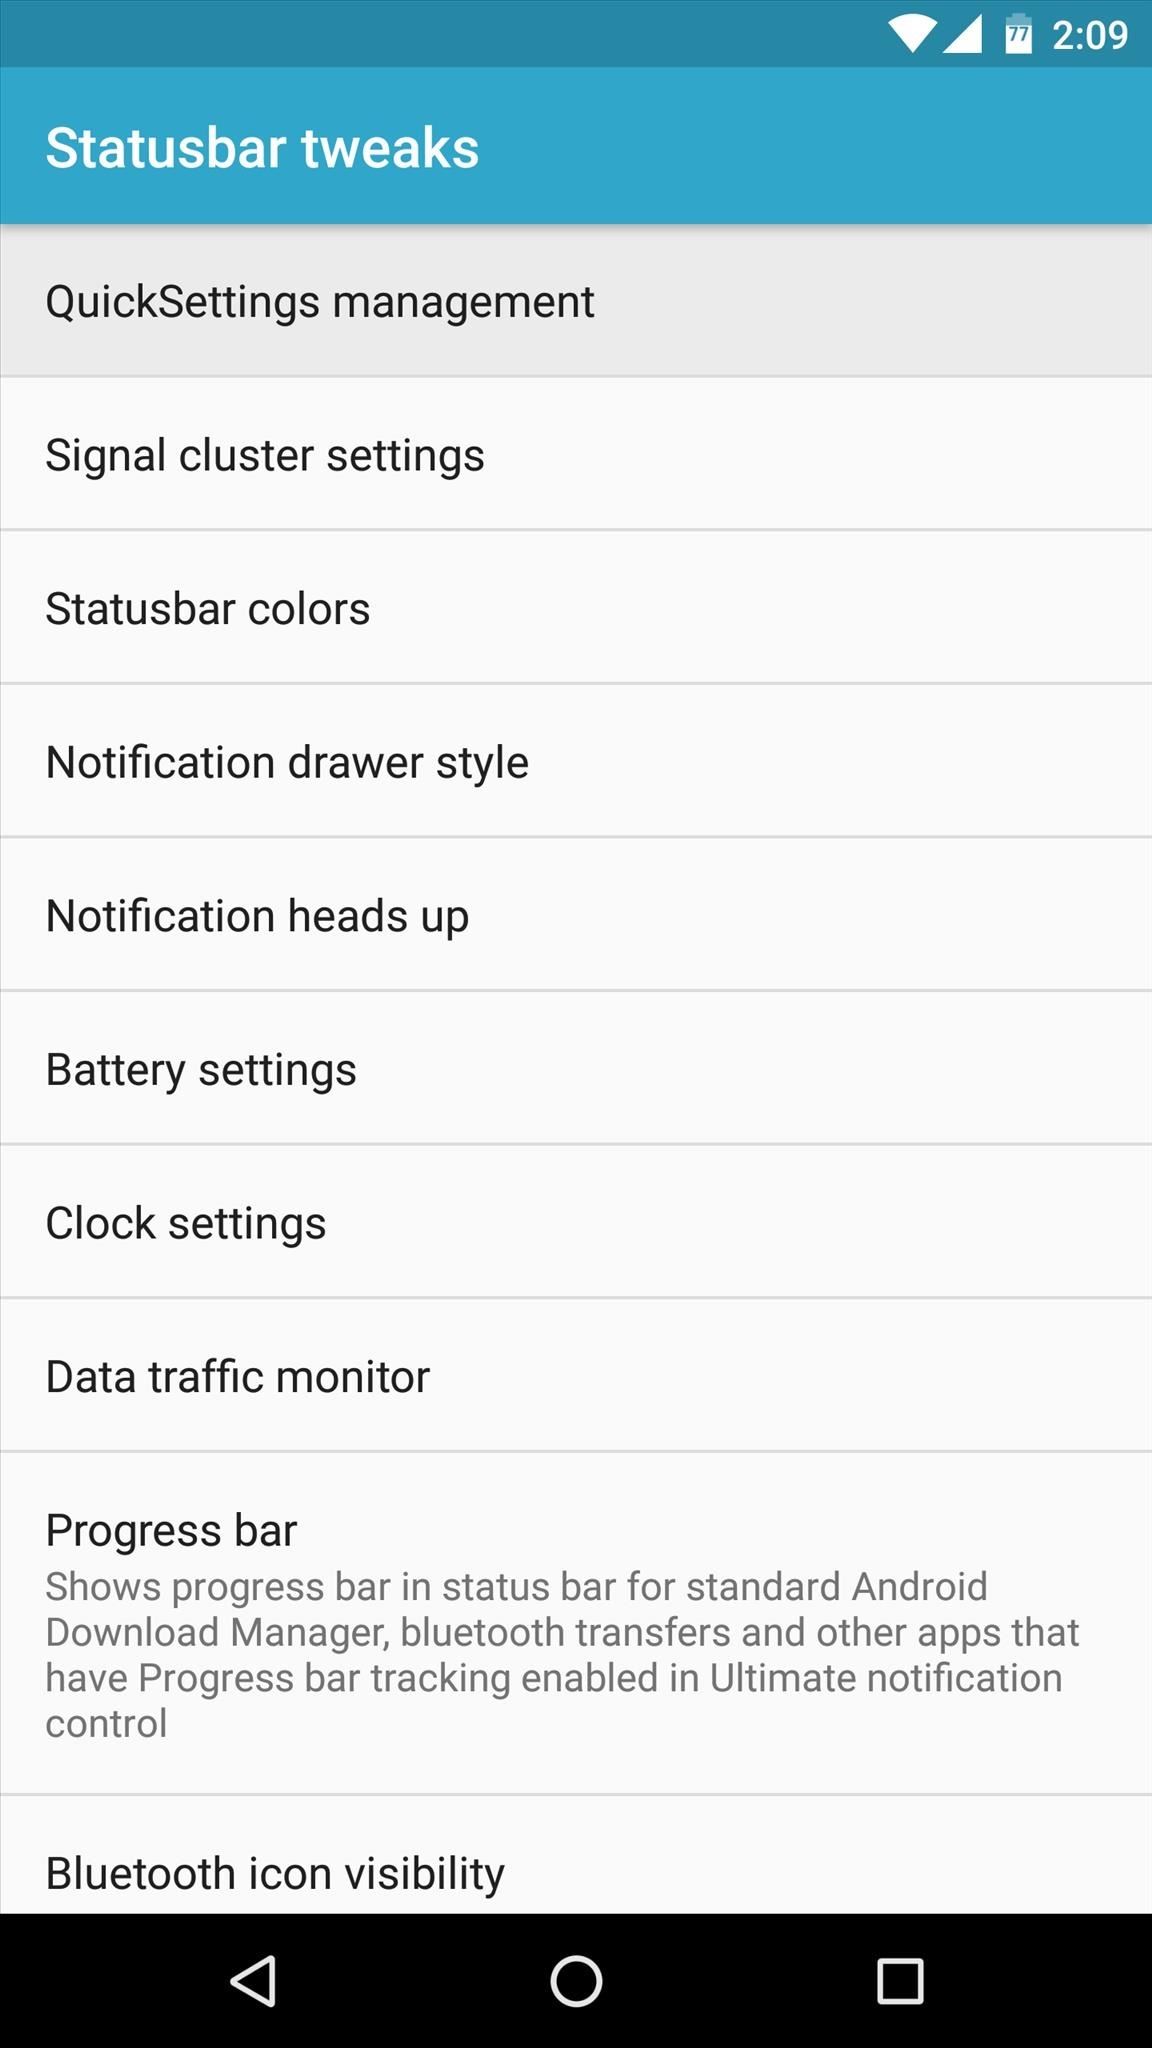
Statusbar TweaksNext up is the "Statusbar tweaks" menu. Within this one, the first setting of note can be found under the "QuickSettings management" section.Own Your Quick-SettingsFrom here, select the "Statusbar QuickSettings tiles" option, then you'll see a menu that lets you add, remove, or reorder the toggle switches in your Quick Settings menu. It's a great way to customize one of Android's most centralized menus, but it should be noted that this can cause conflicts if you've used Marshmallow's hidden System UI Tuner option to tweak your Quick Settings already. While you're still in the QuickSettings management menu, there's another option worth checking out. By default, you have to either swipe down twice from the top of your screen, or swipe down with two fingers to access Android's Quick Settings, and that's just too much work.Access Quick-Settings FasterIf you'd like to change that, select the "Quick pulldown" option, which lets you access Quick Settings in a single swipe from either the left or right edge of your status bar. From here, I'd recommend choosing "Right" as the Quick pulldown edge, because this is more in line with the way Android tablets work, and the options you adjust in the Quick Settings menu are already represented by icons on the right side of your status bar. Customize the ClockBacking out to the main Statusbar tweaks menu, the next noteworthy options can be found under the "Clock settings" category. First, if you use a 12-hour clock format, tick the box next to "Hide AM/PM" to get rid of the status bar indicator that tells you whether it's dark or light outside—something your eyes already do for you.Hide Alarm IconThen beneath that, the "Hide alarm icon" option gets rid of the indicator that appears in your status bar when you have an alarm set. This is useful for freeing up space in the status bar, especially if you use your phone as your main alarm clock. Tune Brightness from the Status BarFinally, towards the bottom of the main Statusbar tweaks menu, the "Enable brightness control" option is an interesting one. If enabled, this will allow you to simply slide your finger across the status bar to adjust your display brightness from any screen.Double-Tap to LockFrom there, if you tick the box next to "Disable peek," you can then enable the "Double-tap to sleep" option, which will let you lock your device from any screen by tapping the status bar twice.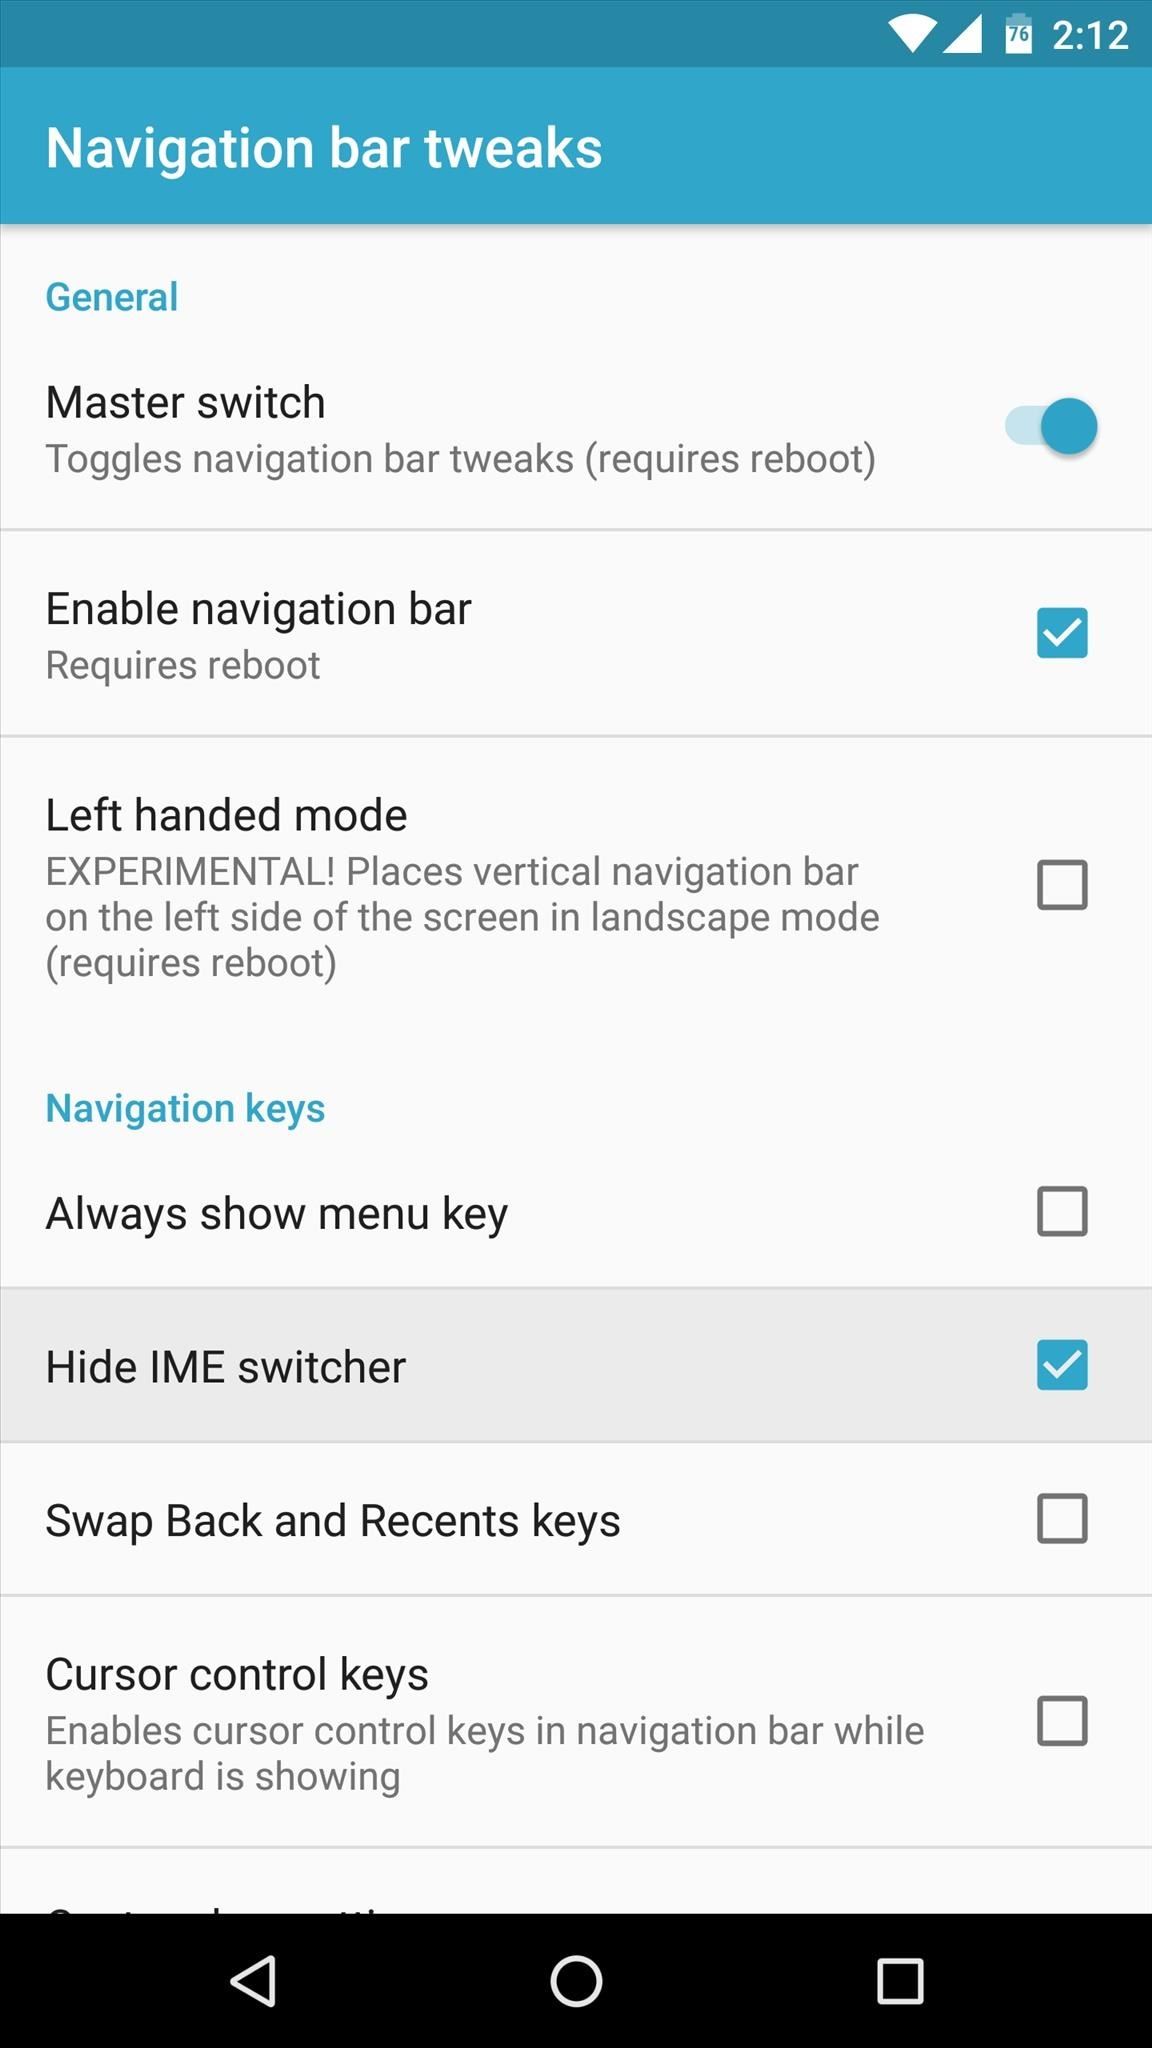
Navigation Bar TweaksThe next main category worth visiting is the "Navigation bar tweaks" menu—one you'll definitely want to check out if you have on-screen navigation buttons. Before you can make any changes here, you'll need to enable the "Master switch" option at the top the screen.Hide the Keyboard SwitcherFrom there, you'll probably want to tick the box next to "Hide IME switcher," which gets rid of the icon that appears in your navigation bar when you're using a third-party keyboard.Change Navigation Bar SizeThen finally, three sliders towards the bottom of this menu allow you to adjust the size of the navigation bar itself. Here, you can shrink the height of both portrait and landscape navigation bars, plus you can adjust the width and spacing of the buttons themselves.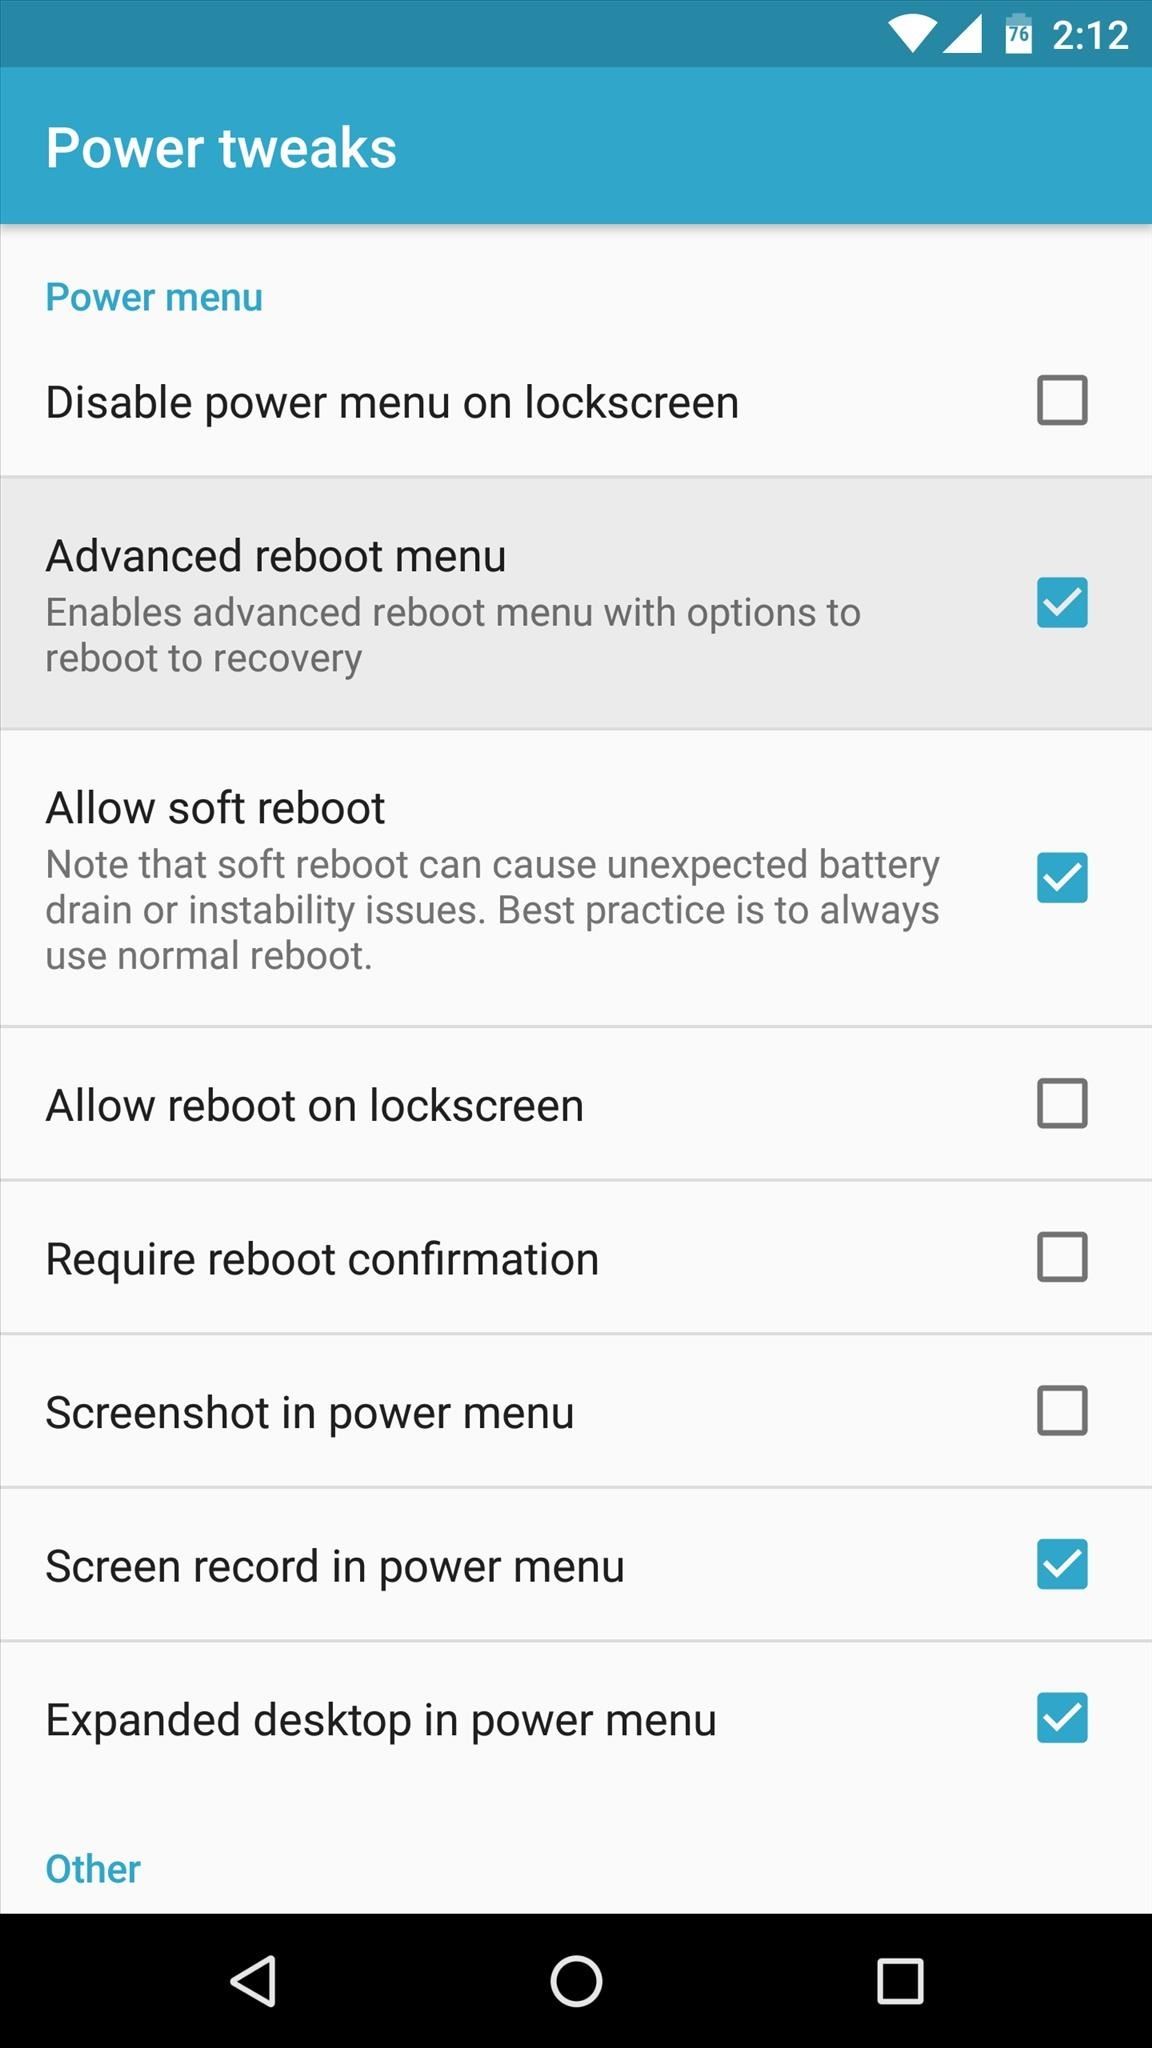
Power TweaksNext up, the "Power tweaks" menu in GravityBox has a pair of noteworthy options.Add Options to Power MenuFirst, tick the box next to "Advanced reboot menu," then the standard popup that appears when you long-press your power button will now have options for rebooting your device directly into recovery mode or the bootloader menu.Get Rid of 'Low Battery' WarningThen, if you're like me and you keep a close eye on your device's battery life already, the popup that appears when you hit 15% is probably just a nuisance to you. To remedy that, I'd recommend setting the "Low battery warning" option to "Non-intrusive," which will cause this warning message to appear as a simple notification in your status bar instead.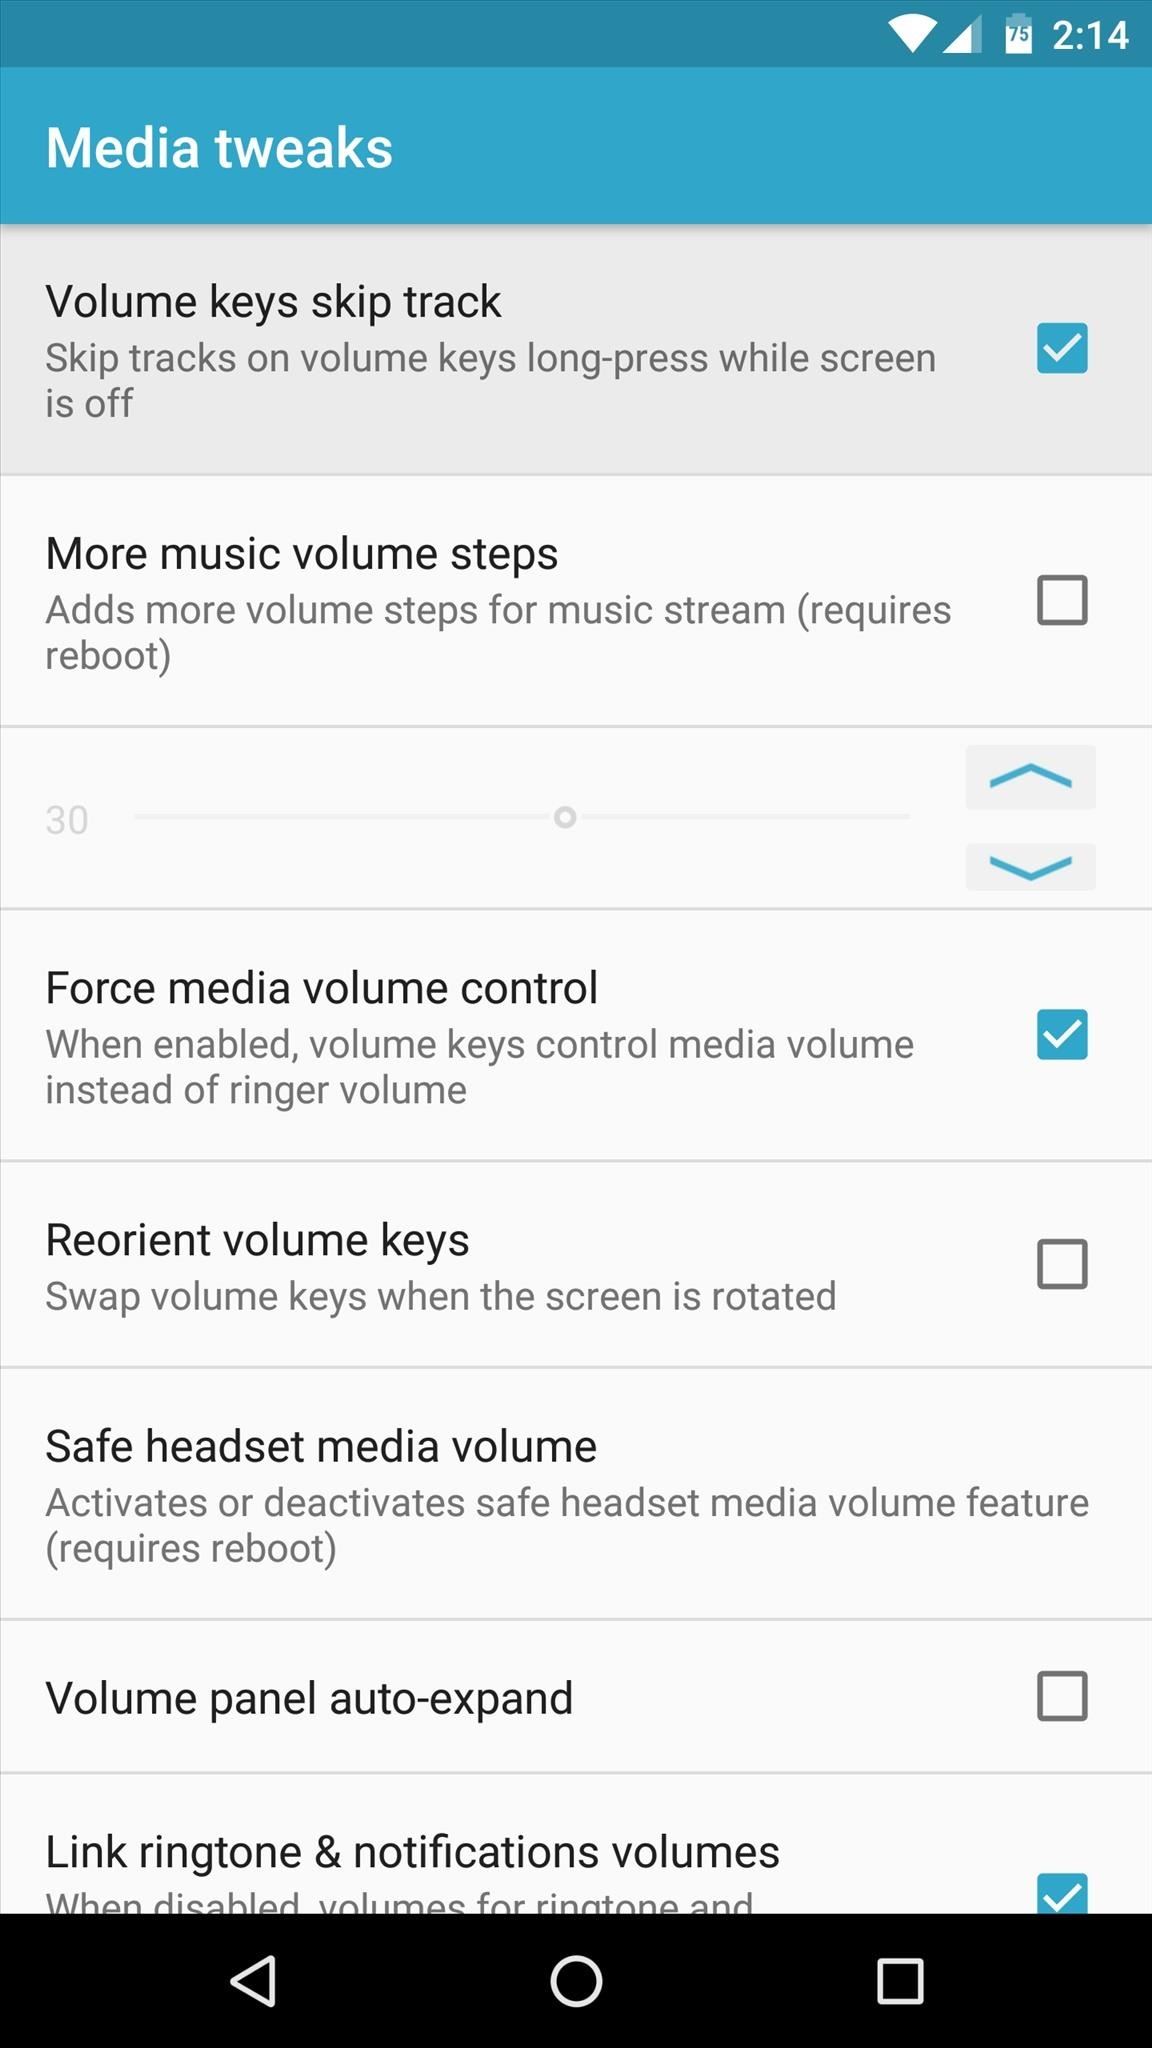
Media TweaksHere, you can adjust several options for media playback on your device.Skip Tracks with the Volume ButtonsUnder the "Media tweaks" menu, the "Volume keys skip track" option is a fun one. With this enabled, you can skip to the next track in your playlist without ever turning your screen on—just long-press the volume up button to skip ahead, or do the same for the volume down button to flip back to the last track.Set Media Volume as DefaultThen perhaps one of my biggest gripes with Android is how the volume buttons control notification volume by default, despite the fact that media playback volume needs to be adjusted far more frequently. To remedy this, simply tick the box next to "Force media volume control," and from now on, your volume buttons will always adjust media volume by default.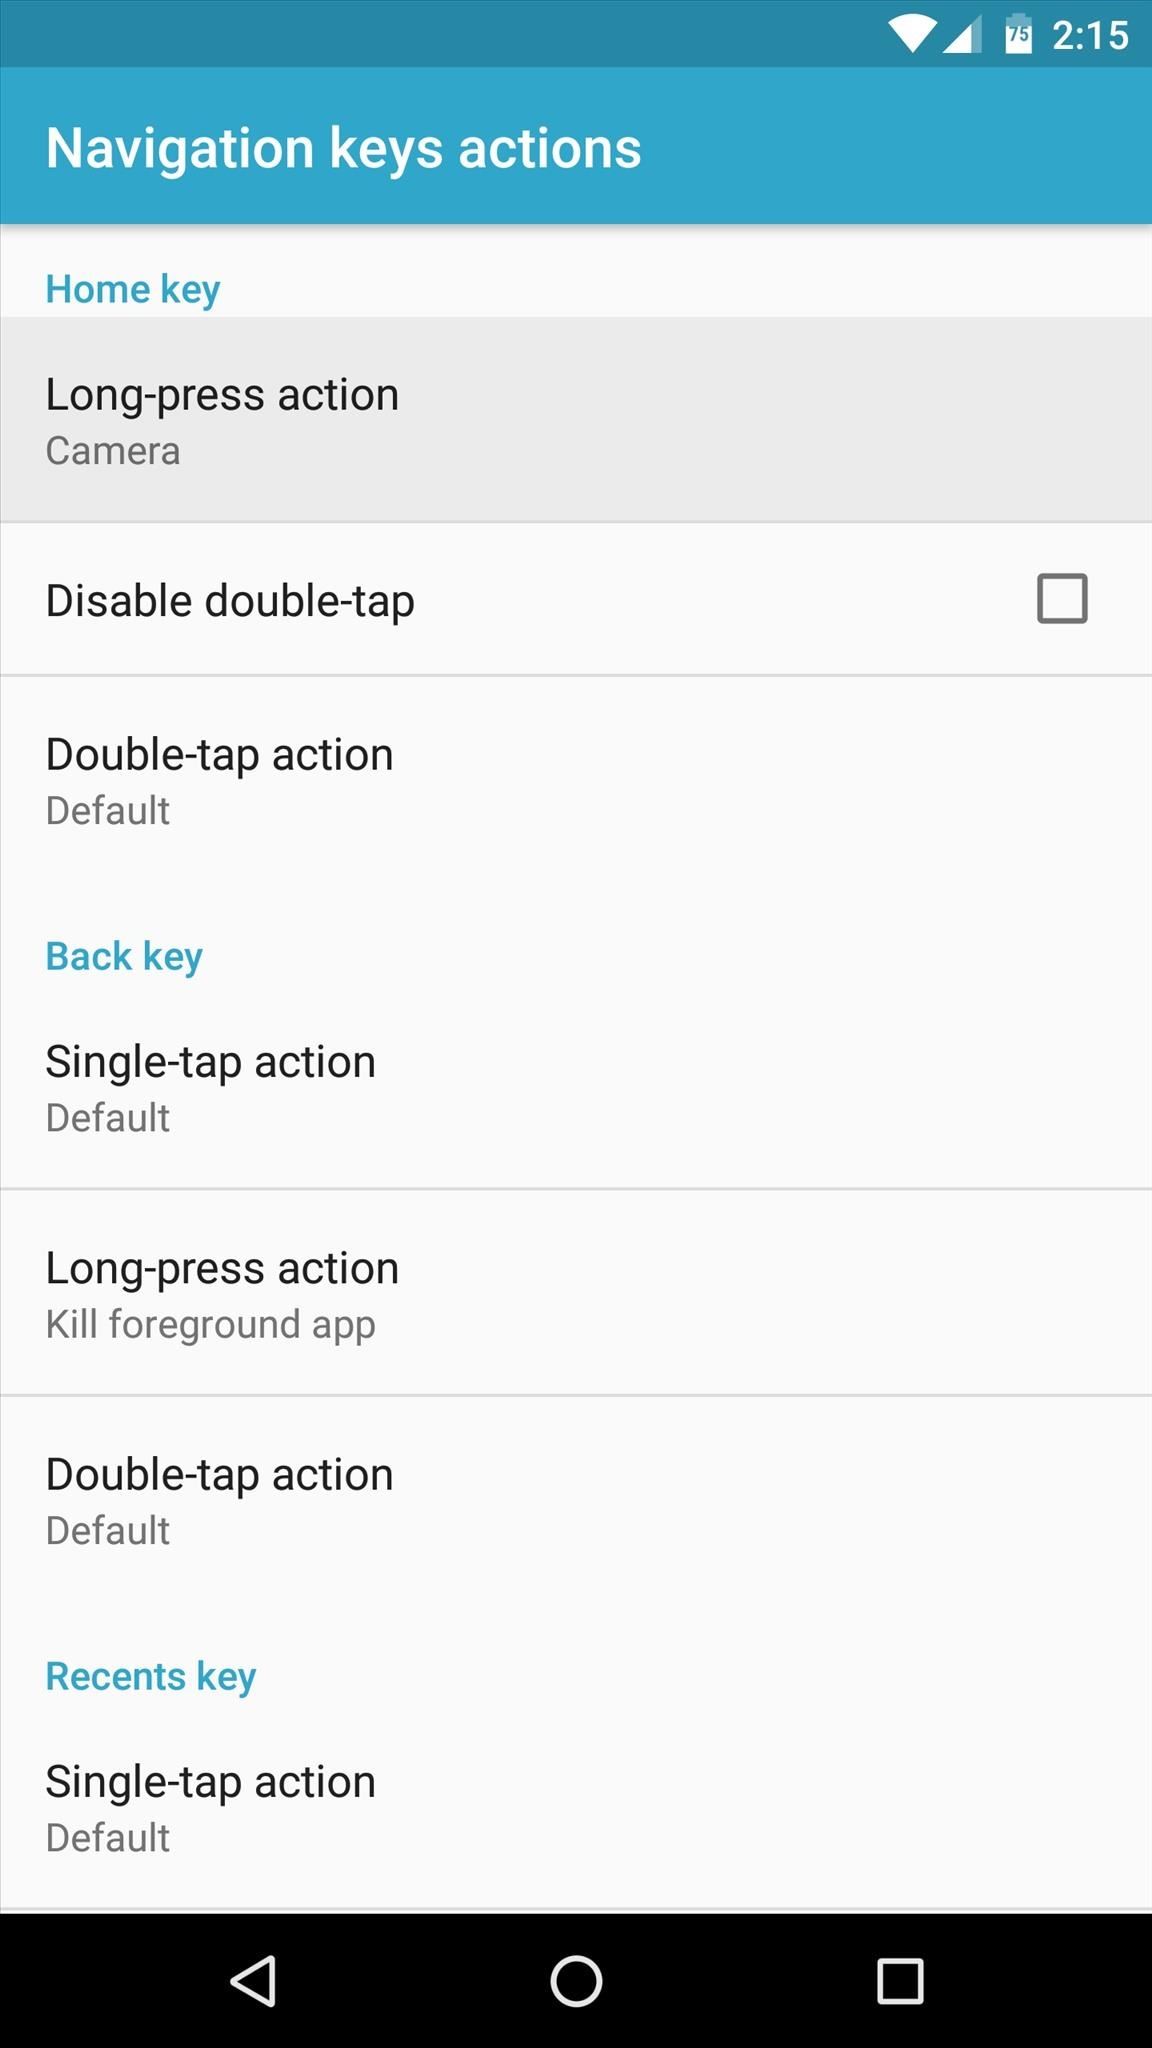
Navigation Keys ActionsFrom there, the "Navigation keys action" menu has some useful tweaks, but most require that you've enabled the "Master switch" option under "Navigation bar tweaks."Add Actions to the Navigation BarMainly, you can assign custom long-press and double-tap actions for each of your navigation buttons, and the setup process is extremely straightforward.Control Cursor with Volume KeysBut the most interesting option in this menu is "Volume key cursor control." Tap this one, then select "Volume up/down moves cursor left/right," and from now on, when you're typing in any text field, you can use your device's volume buttons to precisely move the cursor.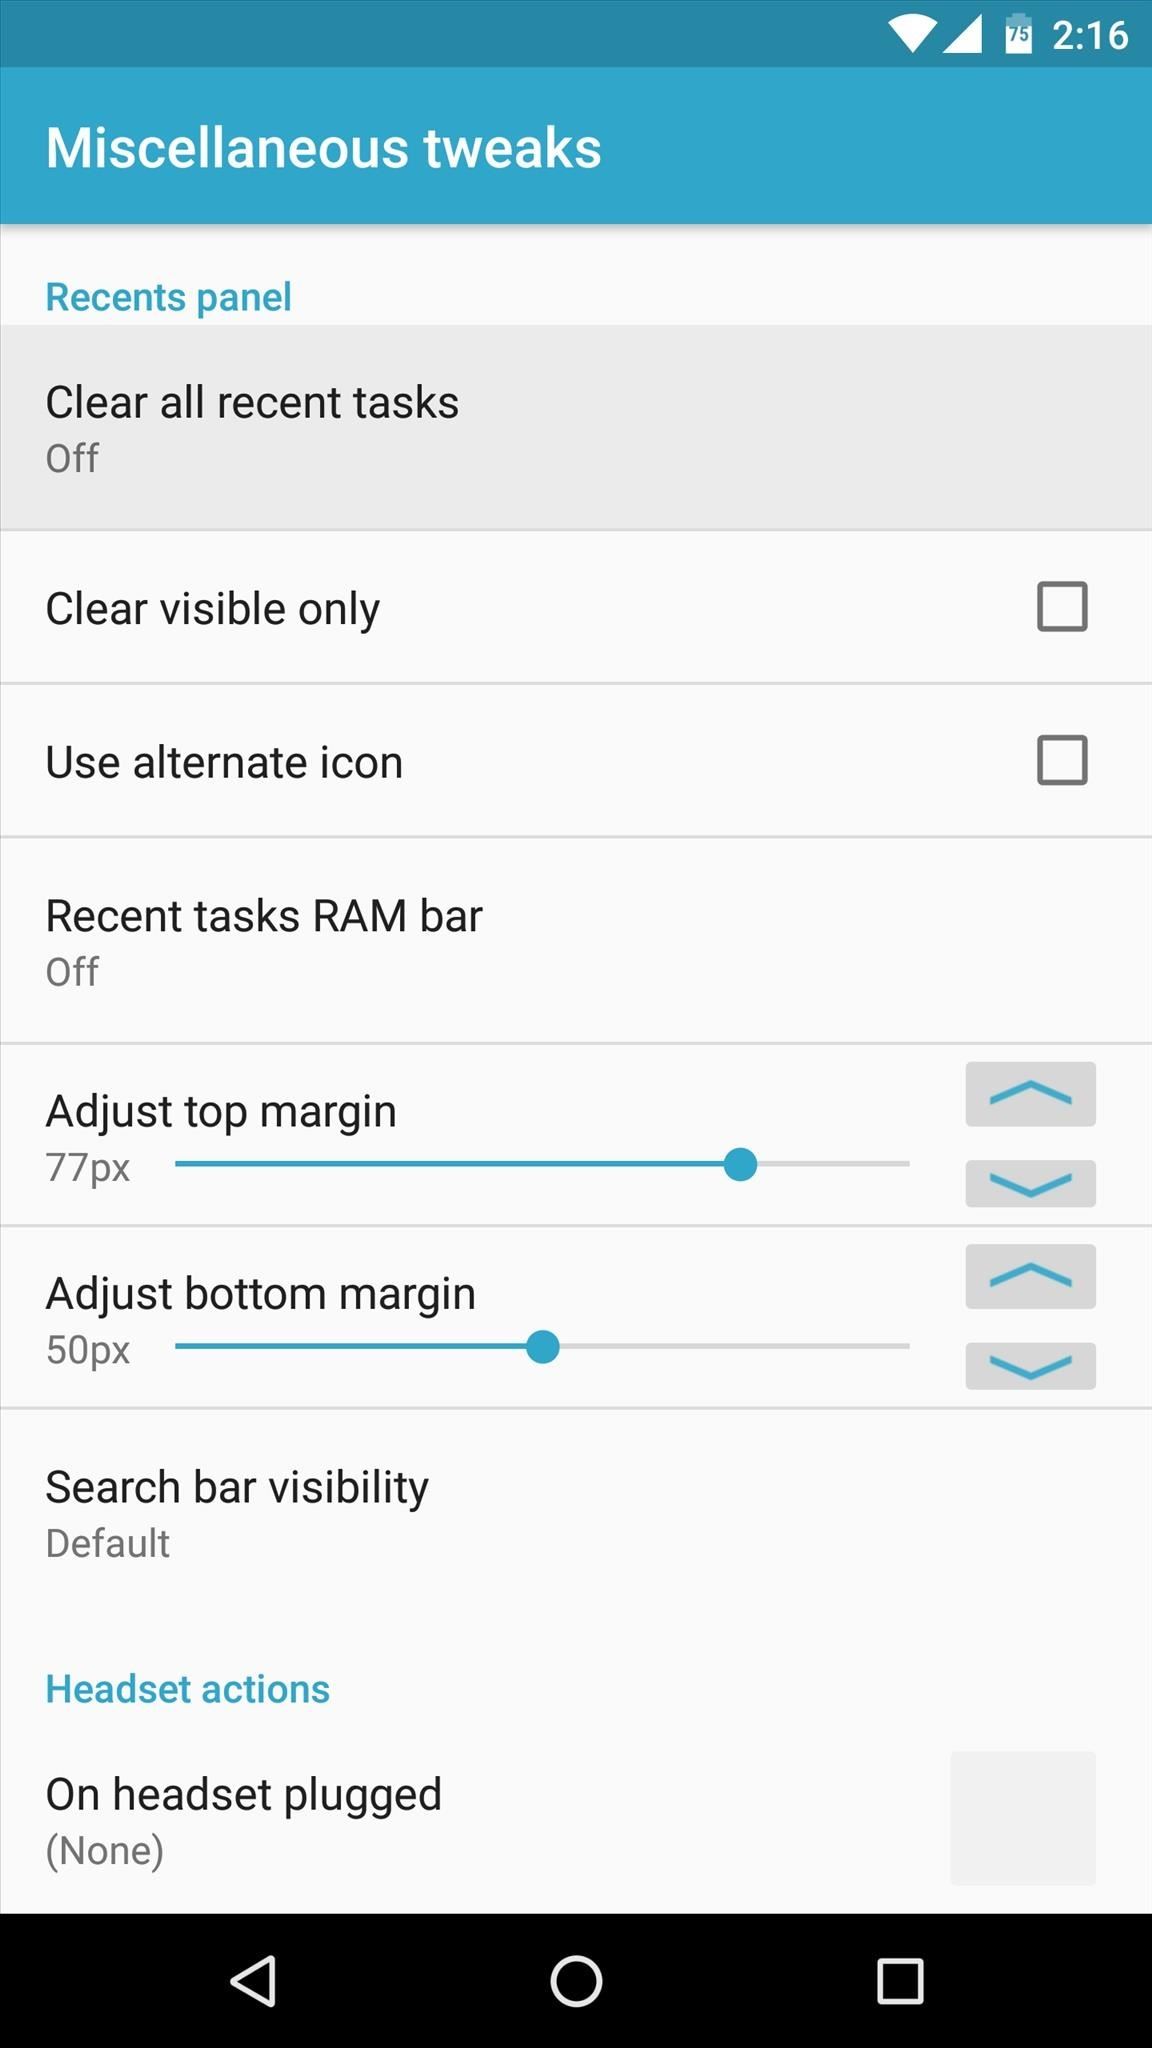
Miscellaneous TweaksThe last GravityBox menu worth delving into is "Miscellaneous tweaks."Clear All RecentsThe most noteworthy option is "Clear all recent tasks," which places a button in your recent apps/overview menu that clears away all of the entries in one tap.However, this button is white by default, which makes it hard to see in some cases. So to remedy that, I'd suggest ticking the box next to the "Use alternate icon" option, which gives the "Clear all" button a bit of Material Design instead. Follow Gadget Hacks on Facebook, Twitter, Google+, and YouTube Follow Apple Hacks on Facebook and Twitter Follow Android Hacks on Facebook and Twitter Follow WonderHowTo on Facebook, Twitter, and Google+
Cover photo and screenshots by Dallas Thomas/Gadget Hacks
Google Maps Navigation for Android. While the TomTom iPhone app is a freestanding navigation program, Google's Android navigation software lives inside the phone's Google Maps app. Originally available only on the Android 2.0-based Motorola Droid, Google Maps navigation has now made its way to Android 1.6 devices as well.
First Look: Verizon Droid with Google Maps GPS | Computerworld
Phone functionality Some Android tablets can make calls. While it may look absurd to holding a tablet against your ear, some people actually do that. Chromecast, and other proprietary Google stuff, as expected. Acting as a USB stick Plugging an Android tablet to a computer (like the S3) allows you to move data to/from it. The same can't be said
You can get push alerts to your iPhone from lots of things online like Facebook and Foursquare, but now here's a way to get push alerts sent to your phone from everyday household objects like the mailbox or the refrigerator. In this Arduino project, a mailbox is wired so that a push alert is sent to the iPod when mail is delivered.
How to Manage Notifications on the iPhone - Lifewire
Chrome is the most popular internet browser nowadays, so we've decided to research extensions that increase your online safety. Even though it claims to automatically protect you from security issues, such as phishing attacks and dangerous websites, as the online threatscape evolves, it never
Remove the Secure Chrome Pro Chrome Extension
Pusher's Beams SDKs and API make it easy to send push notifications to all of your iOS and Android users with one request.. The service manages your app credentials and the lifecycle of device tokens which are both required for every request to the Apple Push Notification service (APNs) and FCM for your Android devices.
How to Only Get Notifications for Emails You Care About on
The Tile Pro tracker is a must-have accessory and a great gift for photographers. It will help them keep tabs on their pricey gear, as long as their phone is within the nifty gadget's Bluetooth range of 300 feet. In case your recipient loses an item, they'll receive notifications when the tracker comes within the range of another Tile user.
2018 Gift Guide: Must-Have Phone Accessories for Movie Lovers
How to Enable Developer Options on Your Nexus « Nexus 7
Nov 29, 2010 · For reasons inexplicable, a "Today I Learned" thread on Reddit has turned into a treatise on how to make Google Translate beatbox for you, among other things. It must have taken some intense
Turn Google Translate into a Beatbox - GTPlanet
Unroot Samsung Galaxy Note5 and restore back to official stock firmware using Smart Switch (First Method) There are two effective method to unroot the Samsung Galaxy Note5. The first method is by using Samsung's owned app called "Smart Switch" that allows Galaxy Note 5 users to back up and transfer files but it also capable for restoring
Unroot and Restore Galaxy back to Stock using Samsung Odin
If you've had your iPhone, iPad or iPod Touch for quite a while now, then you must have surely heard of or read on the web about "DFU mode". Of course, if you have no experience whatsoever
How to put iPhone & iPad into DFU mode? | iActivate: Apple
How To: Take pictures and shoot video with a Samsung Galaxy Tab How To: Take photos and videos using the camera on the Samsung Galaxy Tab How To: Change the wallpaper background image on the Samsung Galaxy Tab How To: Record videos using the Samsung Galaxy Tab's built-in camera
How to Take pictures and shoot video with a Samsung - Tablets
Before starting any drive where you're using Google Maps for directions, it's vital to make sure the app is functioning correctly, specifically, navigation prompts. After initiating turn-by-turn directions on your Android or iPhone, the last thing you want to worry about is Google Maps not audibly
How to pair and use Plantronics W740 with your Bluetooth Cell Phone. Most of our modern day cell phones (smart phones) can be paired to multiple Bluetooth headsets and Bluetooth hands-free devices, but it can only be connected to one device at a time.
How to Connect Bluetooth Headphones to a Phone - Lifewire
0 comments:
Post a Comment