How To: Switching from iOS to Android? Here's Everything You Need to Do
Smartphone manufacturers do their best to keep you tied down to their ecosystem, but the reality is that there's not much keeping you from switching. Transfer some files, install a few apps here and there, and all of a sudden, you're knee-deep in a new operating system.Don't Miss:10 Things Android Does Better Than iOSThe fact that it's so easy to switch means that you don't have to put up with questionable decisions like Apple's move to ditch the headphone jack for the iPhone 7. Or, if you're simply tired of not being able to manage your files and change your home screen layout, there isn't much reason to stick around.So if you've finally worked up the courage to break free of Apple's shackles and see what's on the Android side of things, give yourself a pat on the back for braving new territory. But first, there's just a few things that you'll need to do before retiring that old iPhone to the junk drawer, and I'll outline the process below.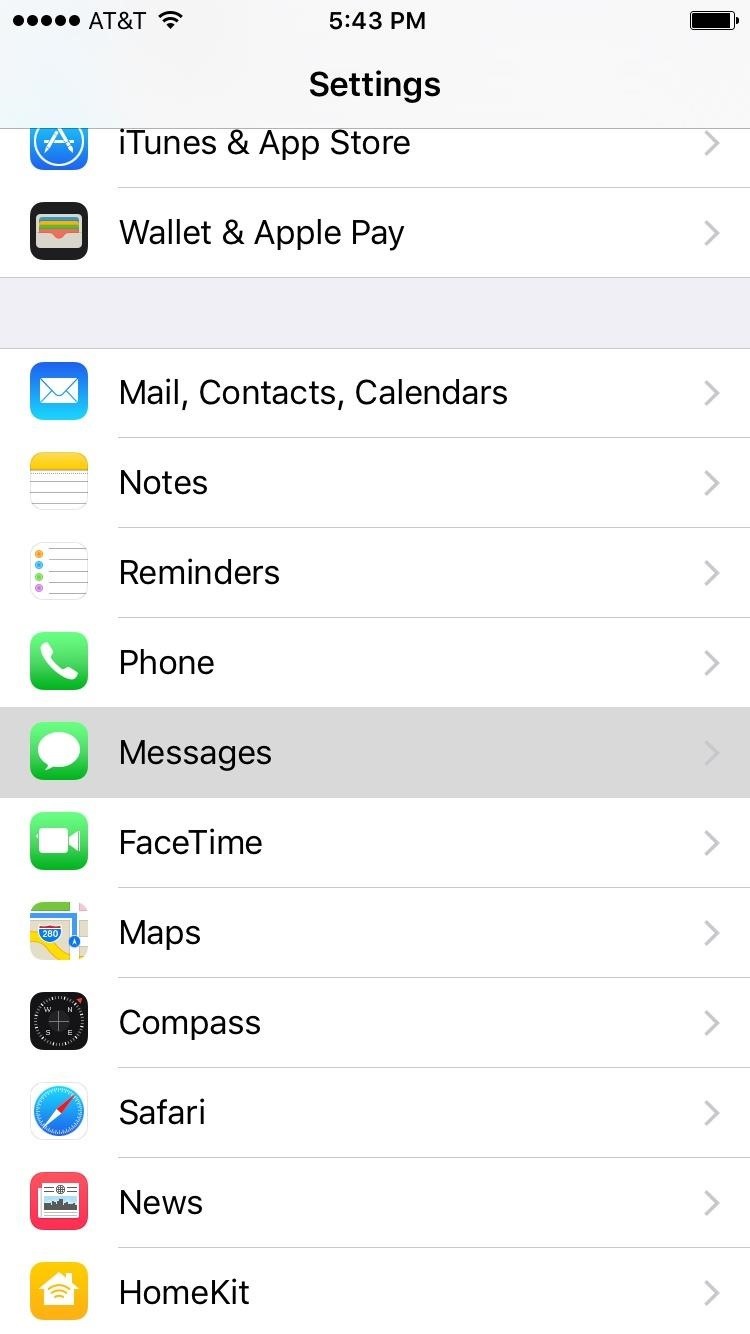
Step 1: Disable iMessage & FaceTimeWith your old iPhone, iMessage is tied to your carrier phone number (provided you enabled it, of course), and if you leave it that way, all of your future messages will be hijacked by Apple's servers. That means you'll never get them on your Android device. This is the number one problem people experience when switching from iOS to Android, so addressing it should be the very first thing you do.Open the Settings menu on your iPhone, then select the Messages entry and toggle off the "iMessage" option up top. You'll also need to disable FaceTime, which uses your phone number as well. Just head back to the main Settings menu, select FaceTime, and toggle it off. As added precaution, disable your phone number from other iOS devices and in the Messages app on your Mac. Sounds simple—but frustratingly, there's more.Next up, head to Apple's Deregister iMessage page, then enter your phone number. You'll receive a 6-digit code in a text message shortly thereafter—enter that into the webpage to completely disable iMessage. On top of that, you'll need to convince all of your iMessage friends to completely delete any group iMessage threads that you're involved with, then start new ones. If they don't, you'll likely never see those messages, because it will keep treating them as iMessages. They might even have to disable iMessages temporarily themselves to make sure your number is being treated correctly by their devices.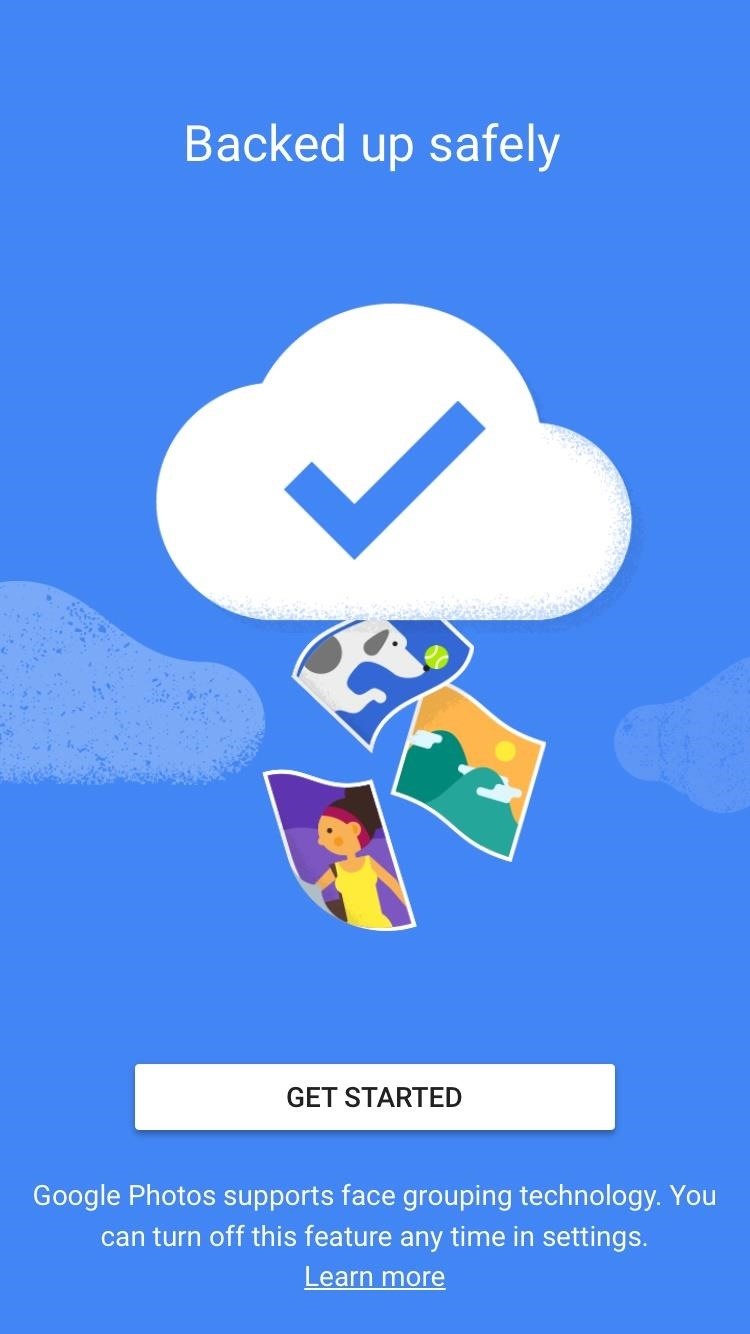
Step 2: Sync Pictures & Videos with Google PhotosYou'll probably want to transfer your pictures and videos from your iPhone to your new Android device, and the best way to do this is by using the Google Photos app.Install Google Photos from the iOS App Store Once you've installed the app on your old iPhone, go ahead and open it up. Right off the bat, you'll be prompted to enable Google Photos' free unlimited cloud backup features, so tap "Get Started" on this message. From here, make sure the "Back up & sync" option is enabled, then select "High quality" as your backup type. After granting the proper permissions and flipping through a feature tour, you'll be taken to the app's main menu. Make sure you're connected to Wi-Fi at this point, as the backup process will start automatically and could take up a lot of data.All told, it can take anywhere from a few minutes to a few hours, depending on how many pictures and videos you're backing up to the cloud. To check on the progress, head to the Assistant tab, then look for the "Backing up photos" message. When it's done, you can rest assured knowing that your precious moments are all safely backed up to the cloud, where you'll be able to access them easily on your new Android device. This won't work with Live Photos, so if you'd like to save those for viewing on your new Android device, you'll have to convert them to videos or GIFs first. An iPhone app called GIF Toaster works quite well for this, and all you have to do after converting your Live Photos is simply open the Google Photos app on your iOS device, then wait for it to finish uploading the new files.
Step 3: Use Google Play Music to Transfer SongsAs far as files go, the only major thing left should be your music library. If you stream songs through Apple Music or Spotify, there's nothing to worry about here, as you can simply install these same apps on your Android device.Install Apple Music from the Google Play Store Install Spotify from the Google Play Store However, if you store actual song files on your iPhone locally—for instance, if you've synced your music library using iTunes—you'll have to find a way to get those over to your Android device. And since Android is Google's creation, their cloud-based Google Play Music service is the best option for this.Don't Miss: How to Transfer All of Your Songs to Google Play Music for FreeGoogle Play Music allows you to sync up to 50,000 tracks to the cloud for streaming playback on any device, plus it lets you "pin" songs to your Android device for offline playback. The only downside is that you'll need a computer to upload your library in the first place, but once you've transferred your music, it'll be easy to access from your new Android smartphone.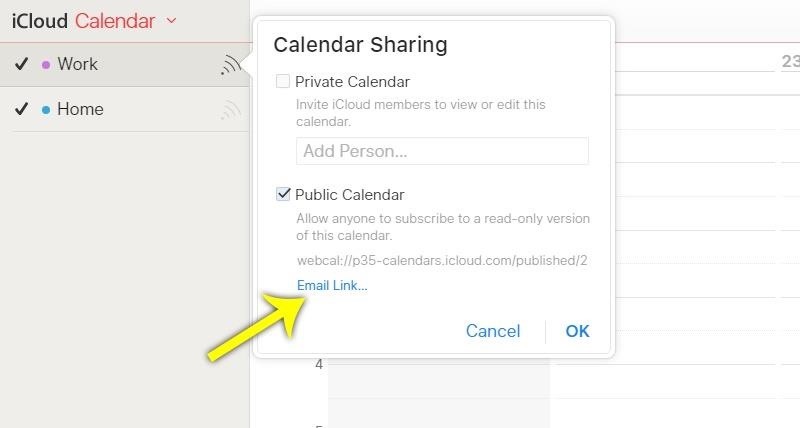
Step 4: Transfer Your CalendarTo move your calendar over, start by heading to iCloud.com on your computer. From here, log in, then select the Calendar option. Next, click the share icon to the right of any calendar, then tick the box next to "Public Calendar," and click "Email Link." After that, enter your own email address to send a link to this calendar. Check your email inbox and find the invitation to subscribe to your calendar. From here, right-click the "Subscribe to Calendar" link, then choose "Copy Link" or "Copy URL." Once you've done that, paste this link into the URL bar in your favorite browser. From here, delete the "webcal" portion at the beginning of the URL, then replace it with "http" and hit Enter on your keyboard. Once you do that, a file with all of your calendar events should immediately start downloading, and its file name will be a series of random letters and numbers. Next up, head to the Google Calendar website, and make sure to log in with the same Google account you'll be using on your Android device. From here, click the down-arrow to the right of the "Other calendars" entry, then select "Import calendar." Finally, click "Choose File," then select the calendar file—remember, it's the one with a bunch of random letters and numbers in the file name. Once you've done that, just click the "Import" button in Google calendar, then allow up to 24 hours for all of your calendar events to finish syncing. Note that this method will only work if you sync your iPhone's calendar with iCloud. If you have a calendar that is stored "On My Phone" only, you'll have to either sync it with iCloud before you start this process, or add your Gmail account to your iPhone's Calendar and then manually transfer the events into Google Calendar one by one.
Step 5: Transfer Your ContactsAs with everything related to Android and iOS, the two operating systems don't play nice together, and your contacts are no exception. However, all you need to transfer your contacts over to your new phone is a computer and your favorite browser.Syncing your contacts with your Google account has more benefits than simply transferring them to your Android device. Once you're done, you'll be able to access these contacts from other Google services like Gmail, Inbox, and the Google Contacts website, so visit my full guide linked below to see how to set it up.Don't Miss: How to Transfer Your Contacts from iOS to Android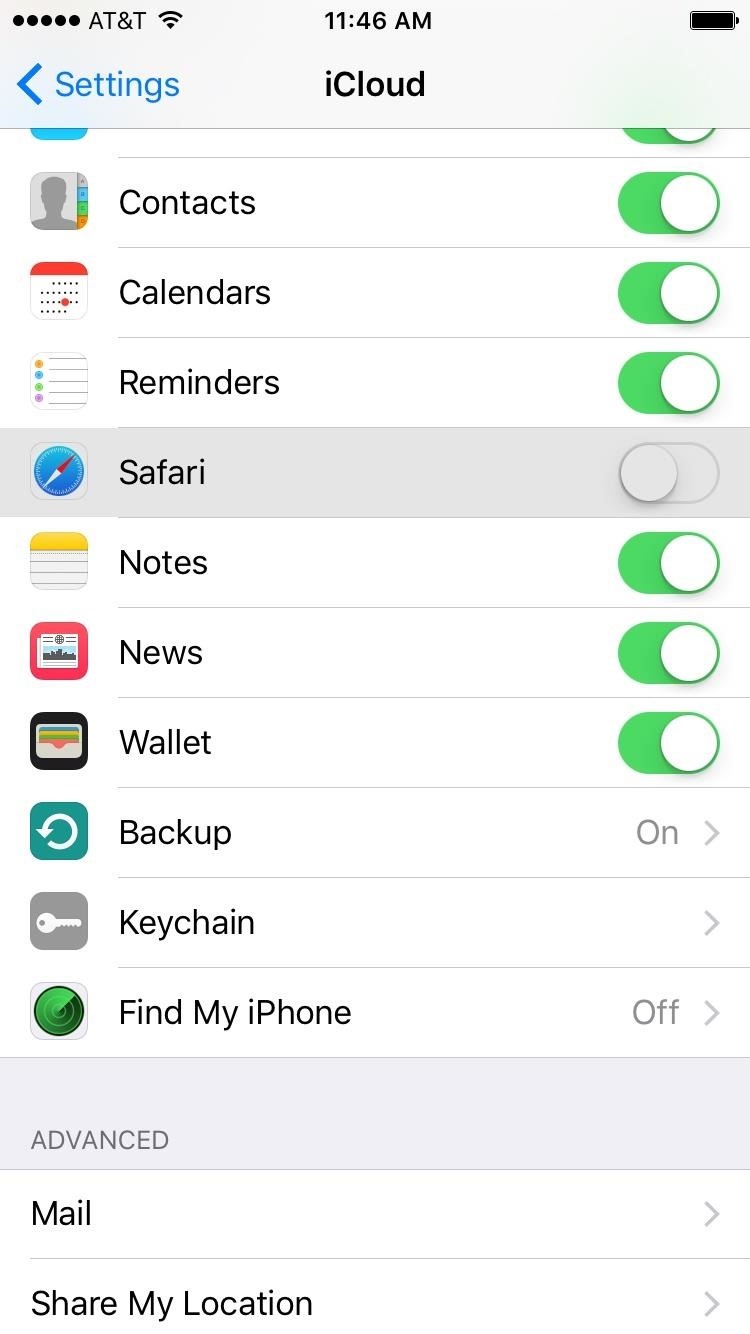
Step 6: Transfer BookmarksFor Safari bookmarks, you'll need to make sure Safari is enabled in your iCloud Settings on your old iPhone so that your bookmarks will sync to the cloud. To do that, head to the iCloud entry in the Settings menu on your iPhone, then enable the switch next to Safari. From here, tap "Merge" when prompted, then wait up to 30 minutes for all of your bookmarks to sync to iCloud. Next up, open Safari on your Mac or PC (making sure you're signed in with your iCloud account), then head to the File menu, and select "Export Bookmarks." From here, you'll be prompted to select a save location for your bookmarks, which will be stored as an HTML file. After that, install Google Chrome on the same computer, then sign in with the same Google account you plan on using with your Android device. From here, click the three-dot menu button in the top-right corner, then hover your mouse pointer over the "Bookmarks" entry to expand it, and select the "Import Bookmarks and Settings" option. Select "Bookmarks HTML" file from the drop-down menu, then click the "Choose File" button. From here, open the HTML file that you exported with Safari, then your bookmarks will be imported into Chrome. Allow up to 30 minutes for your bookmarks to be synced with Google's server, then you'll be all set to go.
Step 7: Save Notes, Reminders & iTunes PurchasesA few more things you might want to transfer to Android may include Notes and Reminders, as well as iTunes purchases.As for Notes, there's no easy way to back up and transfer items from Notes to an Android app. You'll have to sync them and open up Notes in iCloud, copy/paste all of the notes into documents that you can transfer to Android later, then copy/paste them into a similar app like Google Keep.When it comes to Reminders, you're best to just sync them with iCloud and do the same as with Notes. You can export them into an .ics file, but only if you have a Mac, since you can't export from iCloud.com. And importing them into an equivalent Android app is iffy because of the file format. So it's best to just do this manually.Movies, TV show episodes, and music videos purchased from iTunes will not play on Android, but you'll still want to back them up using iTunes on your computer so that you can access them from there. There are some apps that can remove DRM protection from these files and convert them into Android-ready files, but they're usually expensive.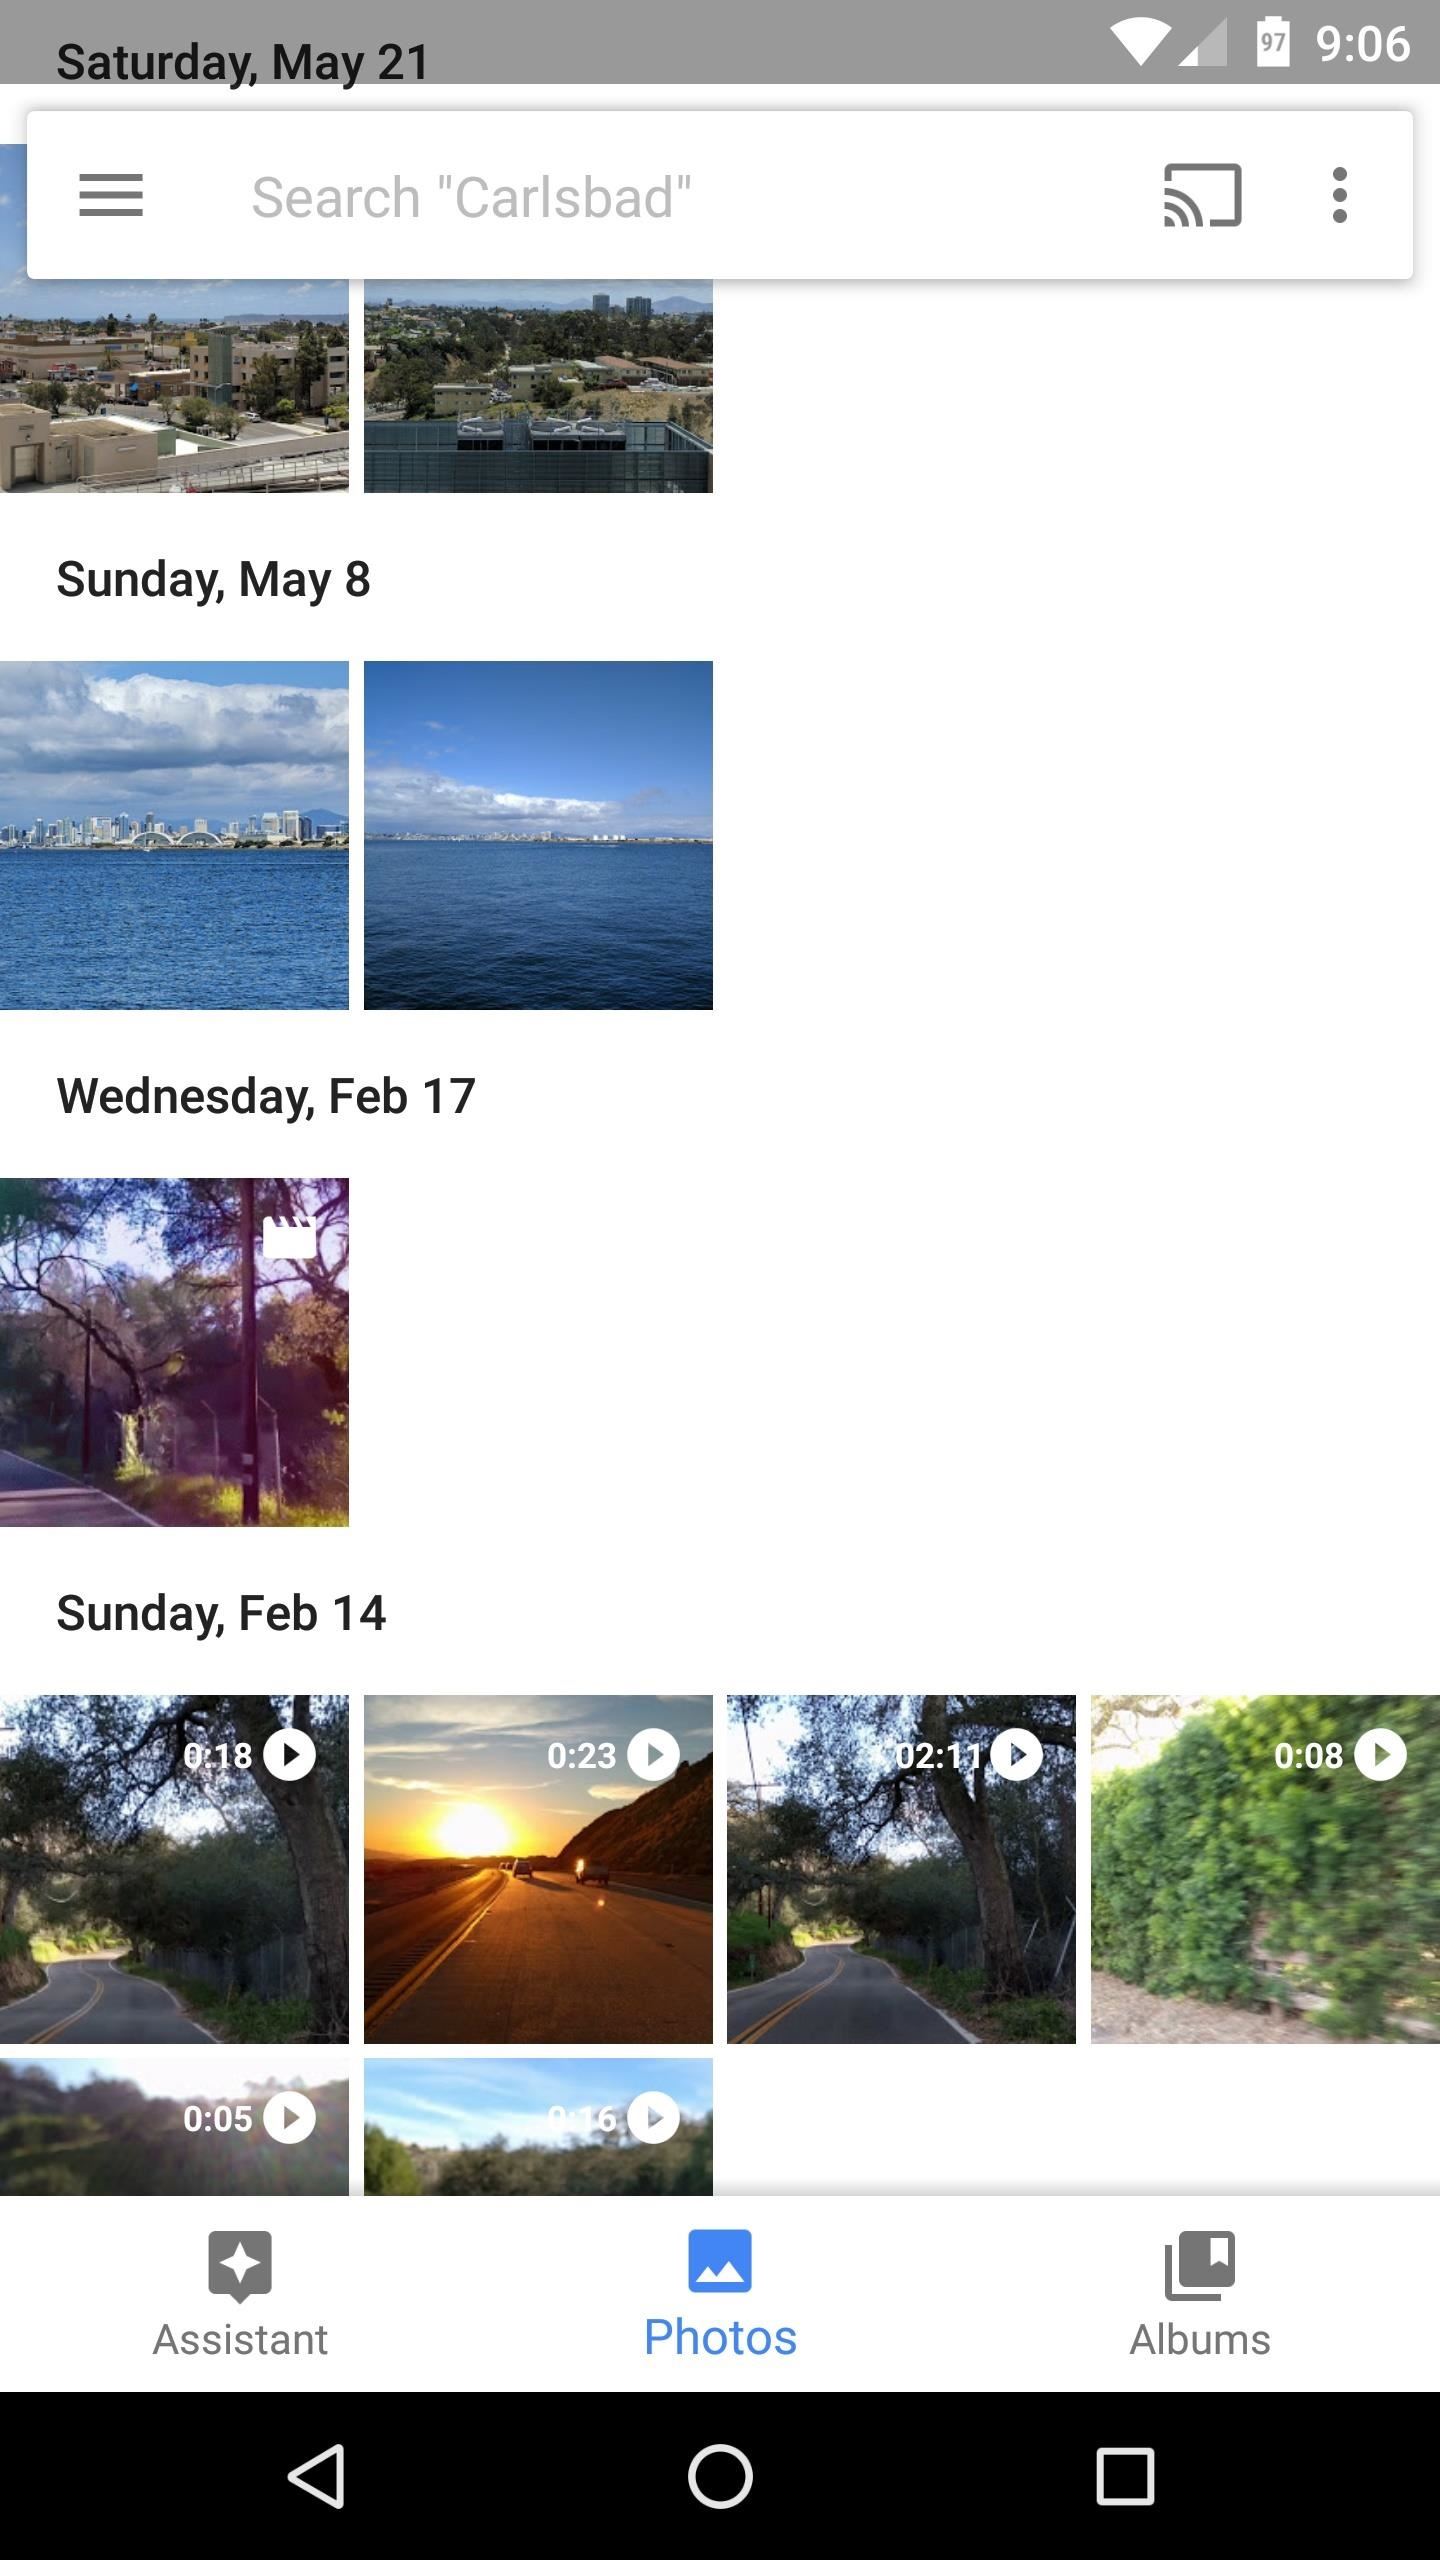
Step 8: Set Up AndroidAt this point, you're done with the iPhone, and everything else will be done on the Android side of things. So once you've run through initial setup and signed in with the Google account you used to transfer contacts, calendars, music, photos, and bookmarks, you'll just need to install a few apps if your phone didn't already come with them.Most Android phones should come with these apps preinstalled, but if yours doesn't, simply tap the following links, then choose "Play Store" to open them, and select "Always." Once you've installed the apps, just log in with your primary Google account if prompted, then you'll see all of the data and media that you synced from your old iPhone.Install Google Photos from the Google Play Store Install Google Play Music from the Google Play Store Install Google Calendar from the Google Play Store Install Google Chrome from the Google Play Store Google Photos, Google Play Music, and Google Calendar (from left to right).
Step 9: Add Your iCloud Email AccountIf you used iCloud as your primary email address on your iPhone, you can easily bring that over to your Android device. To start, launch the Gmail app (which comes preinstalled on all Android devices—just make sure it's updated to the newest version), then open the side navigation menu. From here, tap the drop-down menu with your name and existing Gmail address, then choose "Add account." Next up, select "Other," then enter your iCloud email address and password when prompted. Once you're done there, you'll be asked to set up account syncing options, but the default settings should be fine for most users, so tap "Next" and "Done" to wrap things up. From now on, your iCloud email messages will show up in the Gmail app, and you'll receive notifications when new messages arrive.
Step 10: Replace Missing FunctionalityThere are some fundamental differences between iOS and Android, and while Android is the more functional and customizable operating system in general, there are three useful iOS features that are exclusive to Apple—FaceTime, AirPlay, and AirDrop.FaceTime will only work when both users have a Mac or an iOS device, so that's obviously out of the question here. But cross-platform alternatives like Skype, Facebook Messenger, and Google Hangouts simply don't match the video quality that you'd get with FaceTime. Luckily, though, Google just released a new video chat app called Duo that actually rivals FaceTime in terms of quality, and the app is available for both Android and iOS.Don't Miss: Google's New Duo App Is Optimized for Mobile Video QualityWith AirPlay, there's a near-perfect Android equivalent to the Apple TV, Google's own Chromecast streaming stick, and it only costs $35. Chances are, you might already have one—or perhaps you own an Android TV with the same Google Cast functionality—but the casting experience is a lot better with an Android device.Don't Miss: All of Our Favorite Chromecast Tips & TricksAirDrop, on the other hand, doesn't have such an analogous alternative on Android—but there are several apps and services that will do the trick. Some work a little better than Apple's AirDrop, actually, since they use different technologies to share files from an Android device. To see all of your best options in this regard, check out our full guide on the topic linked below.Don't Miss: The Best Android Apps for Sharing Files Between Your Devices
Helpful Guides to Get You StartedNow that you've got everything set up, you're ready to start exploring the world of Android. If you're looking for some good alternatives to your favorite iOS apps, the following links should be quite helpful.21 Apps You'll Need When Switching from iPhone to Android The Best Gallery Apps for Android The Best Camera Apps for Android The Best Weather Apps for Android The Best Reddit Clients for Android The Best Music Player Apps for Android Then, if you're interested in learning more about the way your new device works, we've written a series of "Android Basics" tutorials that will take you from absolute beginner to pro in no time. It's a perfect starting point, so bookmark the following link, then read through all of the guides when you get a chance.Android Basics: A Series of Tutorials for BeginnersFollow Gadget Hacks on Facebook, Twitter, Google+, and YouTube Follow Android Hacks on Facebook, Twitter, and Pinterest Follow Apple Hacks on Facebook, Twitter, and Pinterest Follow WonderHowTo on Facebook, Twitter, Pinterest, and Google+
Cover photo and screenshots by Dallas Thomas/Gadget Hacks
Read the latest research on everything from new longer life batteries and batteries with viruses to a nano-size battery. grid and longer-lasting news with ScienceDaily's free email
Sony is developing smartphone batteries that will last 40
Test your logic and your intelligence with these varied tests, similar to those to calculate an IQ (Intelligence quotient) with logical sequences of : - Numbers - Letters - Dominos - Figures - Etc. Training mode : There are 10 questions by test. For every question, you have 60 seconds to answer. If a test is interrupted, it can be continued
A bricked phone is, as the name implies, pretty much useless. There are various degrees of brickdom, but whether it happens as a result of malware or a software update gone wrong, it's always equally annoying.
Opekao vaš Samsung telefon? Evo kako to popraviti s olovkom
Whether you want to collect feedback on your products, crowdsource ideas, or simply entertain your followers, poll stickers offer an entirely new way to engage with your Instagram audience! And while polls in Instagram Stories only allow for two answers questions at the moment, we hope that multiple-choice answers are added in the near future!
Instagram Stories adds poll feature and now brands can ask
Apple's Ditching the 'Do Not Track' Option for Safari in iOS 12.2 «iOS & iPhone :: Gadget Hacks. النصائح والحيل 5 Views
20+ Features Coming to Safari in iOS 13 You Won't Want to
Sn0wBreeze Jailbreak Tool Guide For iPhone, iPad, iPod Touch
News: This Hack Turns Your iPad into a Multi-Window Multitasking Powerhouse for $10 How To: Create Transparent Floating Windows on Your Galaxy Note 9 How To: Enable the Hidden Dark Mode in Windows 10 How To: Use Split View Mode in Mac OS X 10.11 El Capitan
Little Boxes Turns Your iPad into an Old-Fashioned Music Box
How to Get the Facebook Paper App on Your iPhone—No Matter
Just because Microsoft killed Windows Media Center in Windows 10 doesn't mean that you're out of luck with your home-theatre PC. Here's how to turn your Windows 10 machine into your home theatre's
How To: Rip Original PlayStation Games to Play on Your
A Hologram Tv player or Laptop for all , is not something we can all afford , so that's why I love to present , The "PUX Glass " Mono Holographic projector with Glass screen.. for all to make and
Hack a monitor to make DIY dynamic holograms « Hacks, Mods
From what I recall it sounds like /var or some part of it is filling up. There are some threads on things you can do (GMMan prob has them in his sig) to fix it.
How to Install Apps in Windows 10 - Laptop Mag: Find the
Learn how to install an iPhone case for your Apple iPhone 4 and 4S. Learn how to remove the cover from your iPhone 4 and 4S. The simple demo will help you become an expert in a minute.
How to Put On and Take Off an iPhone Case - totallee
Get yourself an Android phone or tablet and you can hack it to work in pretty much whatever way you want—and that extends to input as well. All In One Gestures is one of several apps on the
How to get iPhone X-like gestures on any Android device right
May 7, 2012 Free Unlimited Amazon Music Trial httpsamznto2P5PEMC Free 30 Day Amazon Prime Trial httpsamznto2DZ3Rtw Copy amp paste this andnbspMay 4, 2012 Go to Google Translate 2 Paste the Click on the speaker icon to hear Google Translate beatbox Get the latest Google stock price here Google Translate Beatbox YouTube How To Make Google Translate Beatbox
Here's How To Make Google Translate Beatbox For You
During calling, you can lock your iPhone with CallLock. CallLock is a cydia tweak that locks iPhone screen when you are in call with someone. It prevents you from accidentally pressing any key on your iPhone. Accidentally pressing phone buttons can lead to hold, end a call by mistake.
Locking phone while on call - Apple Community
0 comments:
Post a Comment