How To: Recover Photos & Videos from a Lost or Damaged iPhone
If you have a ton of photos and videos on your iPhone, backing up to iCloud is probably a no-go since it only provides 5 GB of free storage. Yes, you can buy more storage, but who wants to do that? And what happens if you run out of storage, stop backing up, and your phone gets lost, stolen, or damaged.The obvious solution to backing up your iPhone is to just use iTunes, since you're only limited by the space you have on your computer's hard drive. You can then use this backup folder to restore your iPhone at any time with all your photos, videos, apps, contacts, and messages in tact. Not only that, but as long as you back up your device on a regular basis, you'll always have the ability to restore if your phone is ever lost, stolen, or damaged.Don't Miss: How to Free Up Space on Your iCloud Account Don't Miss: The Ultimate Guide to Freeing Up Space on Your iPhone But a better option may be to only restore the media you lost—specifically photos and videos—since you probably don't need all that other crap on your new iPhone. I'm going to show you how to extract photos and videos directly from an iPhone backup file on your computer. There are actually two tools I'll be covering, and both work great, so it's just a matter or which one you like best. 
iBackup Viewer (Mac & Windows)For this first method, we'll be using iBackup Viewer, which is available for both Windows and Mac OS X. There is also a Pro version available, starting at $39.95 for a single computer, which will allow you to pull files from encrypted backups, your Photo Stream (vs. Camera Roll only), transfer files from one device to another, and more.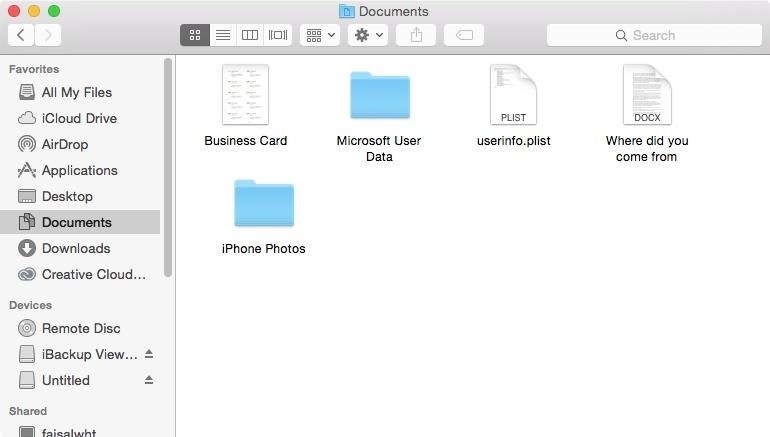
Step 1: Create a Folder to Save Files InDepending on how many files you're going to extract from the backup, it's a good idea to create a folder on your computer to save them in. I created a folder called iPhone Photos and placed it in Documents. Warning: Create the folder anywhere on your computer except your desktop. A large amount of files sitting on your desktop will slow down your computer.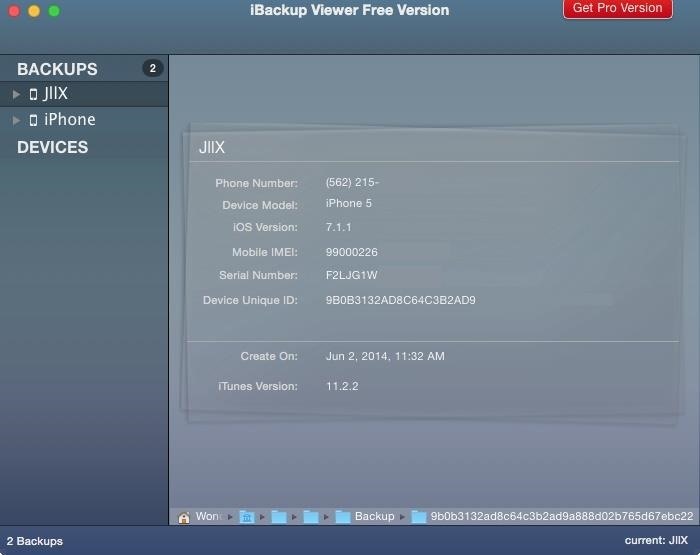
Step 2: Select the Right BackupWhen you're ready to begin extracting photos and videos from the backup file, open up the iBackup Viewer app. In the menu on the left, you'll find all of the backups stored on your computer. Hit the arrow next to the backup file you want to go through.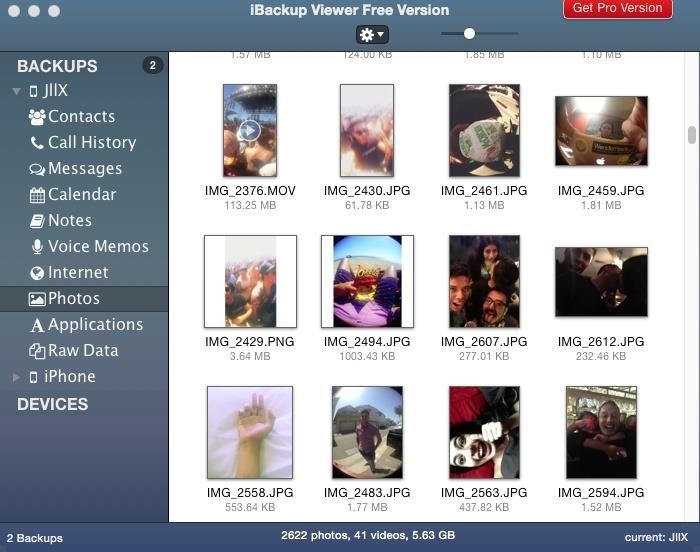
Step 3: Select Which Media to ExtractTo see all of your pictures and videos in the backup, select "Photos." They will appear on the right. Select the files you want to save by clicking on them one by one, or skip to the next step to see how to save them all.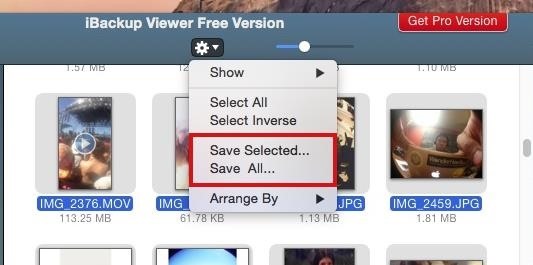
Step 4: Save Photos to Your ComputerOnce your files are selected, click on the gear icon at the top of iBackup Viewer and choose either "Save Selected," or "Save All" if you want to extract all of your photos and videos. Choose the folder that you created earlier to place all of the files in, then click on "Save." Depending on how many files you're saving, it can take anywhere from a few seconds to several minutes to transfer over. It took around five minutes for me to export 2,622 pictures and 41 videos to my folder.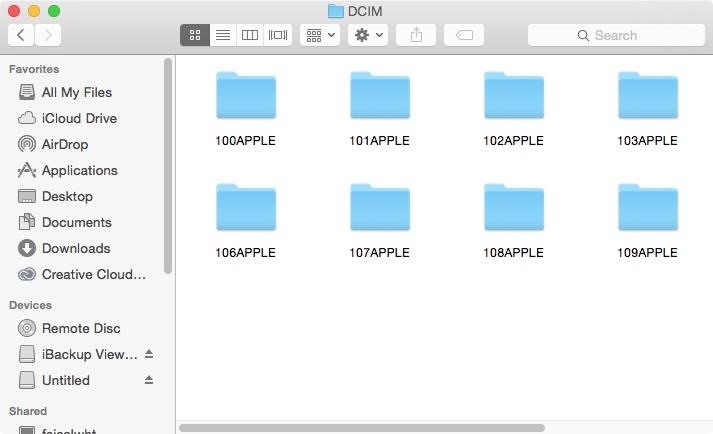
Step 5: Check Out Your PhotosInside the folder you created, you'll see a DCIM folder, which will contain several other folders named something like "100APPLE"—this is where your photos and videos will be located. Each folder will contain hundreds of files, depending on how many you extracted from the backup. Also note that your photos and videos will have the same file name they had on your iPhone, so they will be in order of when they were taken. If you want to rename them, see my previous article on how to rename multiple files at once in Mac OS X.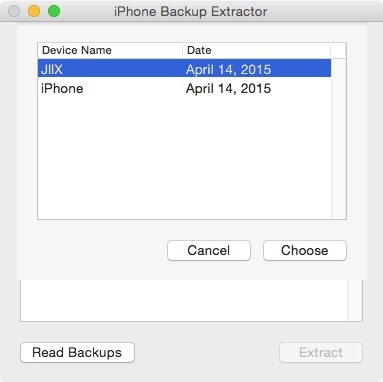
iPhone Backup Extractor (Mac Only)Another way to extract photos and videos from an iPhone backup file is through iPhone Backup Extractor. Designed for iOS 6+ and Mac OS X 10.5+, you can convert a backup into readable Mac OS X files, which you can go through to find photos and videos, as well as text messages, contacts, and more.Download iPhone Back Extractor, install it on your Mac, then open it up. Your iPhone backups will appear; select one to continue and hit "Choose." Now scroll all the way down the list and choose "iOS Files." Click on "Extract," then choose where you want to save your files. A folder called iOS Files will be created wherever you choose to save them. Again, depending on the size of the backup, it can take anywhere from one minute to several. My 8 GB backup file took less than five minutes to convert.Now, go to the "iOS Files" folder, click on "Media," then on "DCIM." You'll see several folders (like in the screenshot below) which will contain all of your photos and videos. In each folder you'll find hundreds of files from the backup. Again, if you want to rename them easily, see my previous article on how to rename multiple files at once in Mac OS X. That's all there is too it. Two applications that simplify the process of restoring your iPhone with an old backup and saving your pictures and videos.Don't Miss: How to Extract Text & Picture Messages from Your iPhone Don't Miss: The Free Way to Save iPhone Voicemails on Your Mac Follow Apple Hacks on Facebook and Twitter, or Gadget Hacks over on Facebook, Google+, and Twitter, for more Apple news, apps, and tips.
Right, I know a lot of you are waiting for me to post this after seeing my videos, social media posts and preview gifs! Many of you will likely have seen the awesome new Android Wear boot animation as leaked in the LG G Watch system dump.
Android Phone Stuck On Boot Screen or Bootloop - Here is the
Mark Jansen/Digital Trends. Do you want to snap a quick video or record your screen on an Android device? Whether you are taking a recording for friends, showing off your gaming skills, or
Each year, Google issues an annual report on Android security, and once again a BlackBerry phone was named one of the most secure Android devices on the market. We are honored that PRIV was included in Google's Android Security: 2016 Year in Review, and we take this as a signal that we're living
News: 8 Reasons the BlackBerry KEY2 Is Already the Best Phone
Below you'll find six ways to display photos in your home that don't require the purchase of cumbersome frames. Many of these tips also make it super easy for you to rotate and switch out different photos as you'd like, so your photo displays can always be changing as you print out more photographs or tap into older photo archives.
Fionnuala O'Leary's Profile « Wonder How To
But since it's a modular software, it can be extended via plugins to add extra functionality. This article assumes you have at least basic knowledge of linux, know how to use the shell, and most importantly, you host your site on your own VPS. The installation is quite simple. I will show you through the step by step installation Moodle on
Moodle open source learning management platform stack - Intuz
NEW: Introducing AdaptiveZoom - an exclusive Action Launcher feature that zooms an adaptive icon to the center of the screen as the app loads! Note: AdaptiveZoom in beta, and requires adaptive icons (so you must be running either Oreo or AdaptivePack). NEW: 2018 Supporter badge is available!
If you are still using iOS 8, you might find out that there is no option to edit the snooze times of your alarms. The default snooze is always at 9-minute intervals. The Tweak app can give you an option to select the snooze for each alarm time. Enable the snooze toggle in order to make changes to your snooze times.
How to Change the Default Snooze Time for Your Alarm on Any
Google's always adding new Easter eggs and fun touches to their products, so it shouldn't be surprising that there are a bunch more hidden in Google Assistant. Here are some of the most fun things you can say to Google that aren't really full games, but are still enjoyable (or even a little useful).
40 fun Google Home Easter eggs to try - CNET
Listen to Music Like a Pro With These 11 Apps and Tricks. as swiping on the screen to skip to the next song. the boost in the volume of your device. I had even gone ahead and placed my
iPhone XS and iPhone XR Tricks: 16 ways to do more faster
How to Remove the gray ad bar from YouTube with AdBlock Plus
How To Tell If Your Cell Phone Is Tapped
News: Snapchat AR Lenses Jump from Mobile to Desktop with Snap Camera App News: 5 Secret Snapchat Lenses That Will Make Your Weekend — Infinity War, the Chainsmokers & More News: Try These 5 Hot New Snapchat Lenses — Fortnite Victory, Apyr & More News: Snapchat Gives John Wick Fans the Tools to Build Their Own AR Effects via Lens Studio
Wear Contact Lenses? Here Are 12 Bad - The Secret Yumiverse
Want to manage all your SMS, WhatsApp and Facebook messages from one place? Drupe is a new app that makes managing all your messaging apps much easier.
Three Apps to Combine All Your Messaging Clients Into One
0 comments:
Post a Comment